Table of Contents
General
Courses are instructional offerings that teach a certain topic. Each course may be made up of several classes. For example, one course may be taught to two separate classes—one that meets on Mondays and Wednesdays, and another that meets at a different location on Tuesdays and Thursdays. All new courses and all course changes must be approved by the ICCB prior to data entry. Please see Section 7: Course Approval of the AEL Provider Manual for more information.
Courses can be set up after funding and instructional categories have been entered into the system. To add a new course, view an existing course, or change an existing course, select the Courses tab.

Add Courses
To access the Add Course page, click on the Courses tab from the navigation bar and select Add Course.
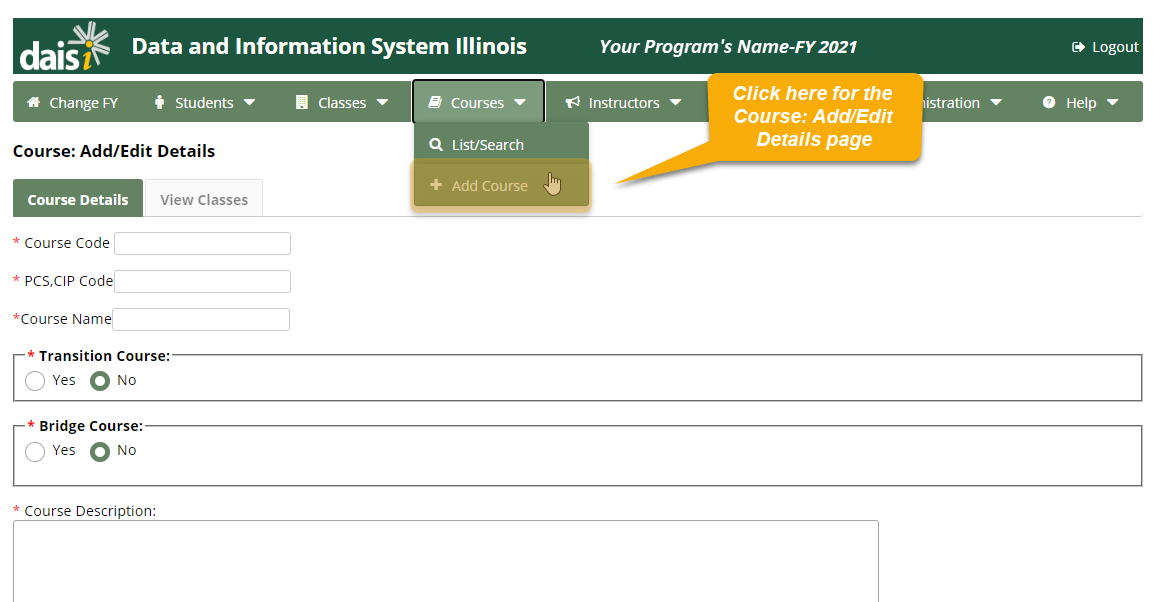
When adding a new course, the required pieces of information must be entered and should be identical to the information approved by the ICCB. You will need to enter the course code, name, description, select an instructional category, enter the PCS/CIP Code (Link for PCS/CIP Code: PCS & CIP CODE.xlsx), and enter the approved range of units of instruction for the course. You will also need to identify whether or not your course is a Transition course and/or a Bridge course.
If the course has been approved as a Bridge course, select yes, and you will be prompted to select the Bridge Course type and the specific career cluster for the course.

Note: All programs are required to incorporate career pathways into the instructional process. This includes providing all adult learners with access to Bridge courses or IET/ICAPS instruction. Therefore, it is vital that all Bridge Courses are designated as such on DAISI so it is documented that your program meets this requirement.
Lastly, check any Misc. items that might apply to the course.

Note: As misc. items are selected, instructional categories may become unavailable for selection. For example, selecting Job Skills will not allow VOC instructional type to be selected.
The system defaults the minimum units of instruction to .5, but the maximum must be entered and updated each fiscal year. The maximum should equal the largest number of instructional units one student might receive in one fiscal year through any combination of classes assigned to this course code. Please see the Classes: Attendance section of this guide for more information about units of instruction.
Click Submit to save the course.
If any corrections are necessary, an error message will display, and red prompts will highlight the fields that need attention.
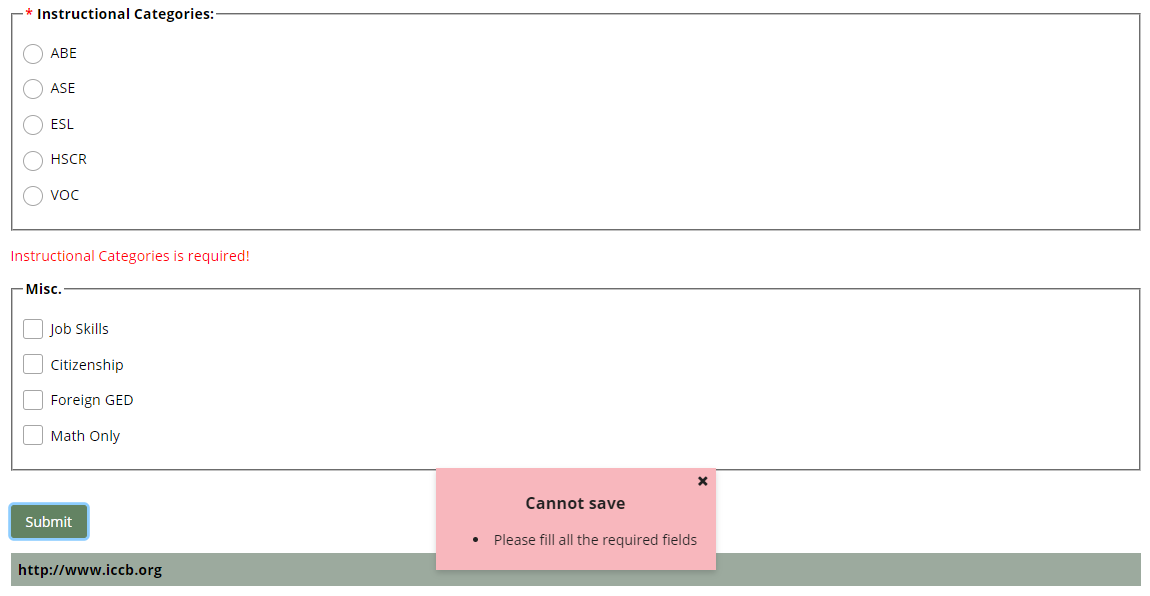
These errors will need to be corrected before a course can be saved successfully. Once you’ve corrected the errors, click Submit to save your changes.
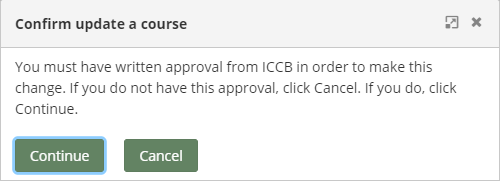
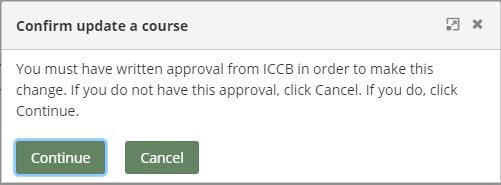
A page will appear with a prompt to certify ICCB approval for the new course. If written approval has been obtained from the ICCB, click Continue to save the new course. If written approval has not been obtained, click Cancel.
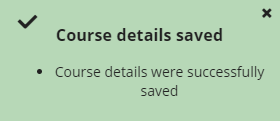
If your course was saved successfully, a green prompt will appear on the screen.
To add an additional course to the system, select Add Course on the Courses tab on the navigation bar, and repeat the steps listed previously.
List/Search
You can use the List/Search feature under the Courses tab to look up a course in order to edit it or to add a new course. To view the List/Search Courses page, select the List/Search option under the Courses tab in the navigation bar at the top of the page.
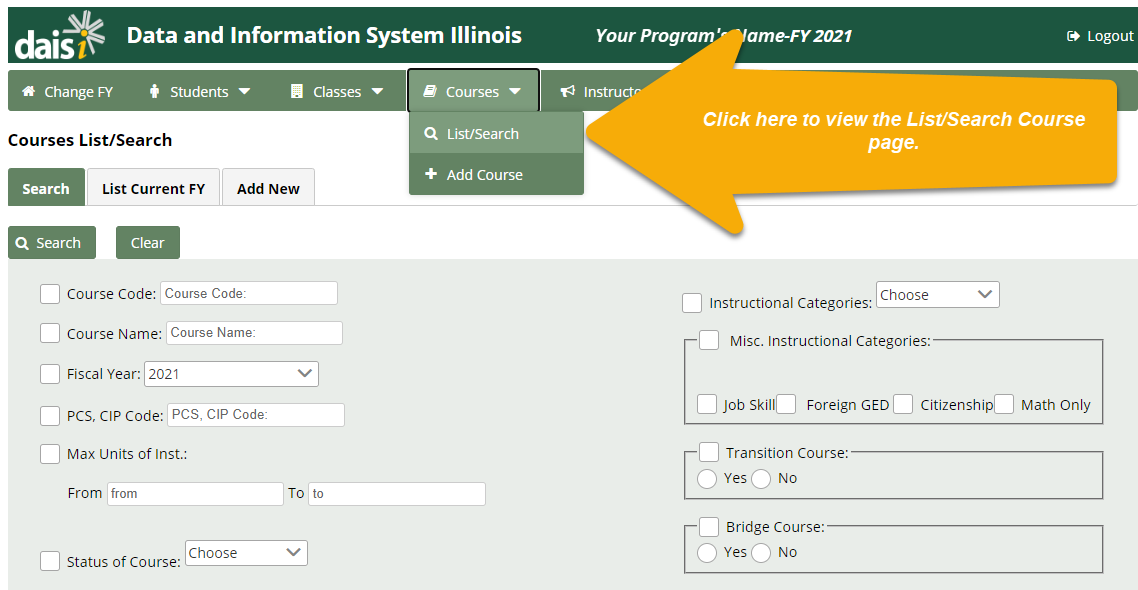
To display all of the courses during the current fiscal year, select List Current FY. You can also add a course by selecting Add New tab.

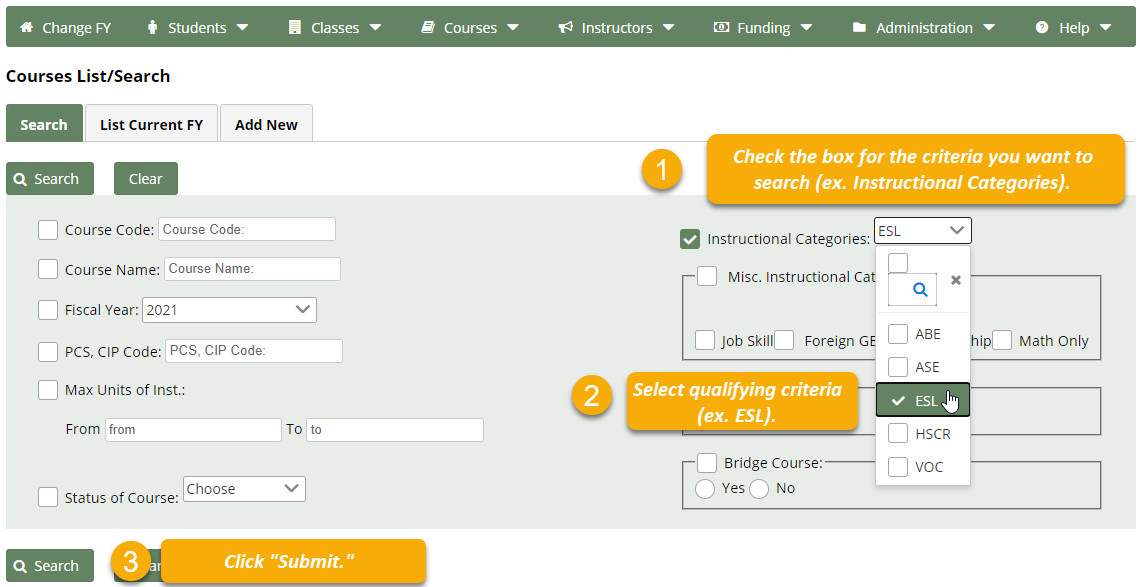
You can conduct a tailored search for your course using the Search tab. Check the boxes for fields you wish to use as criteria for the course(s) you want to see, and specify any qualifying information in the fields to build your search. For example, to see all ESL courses during the given fiscal year, check the “Instructional Categories” box, then select “ESL.” To complete your search, click Search.
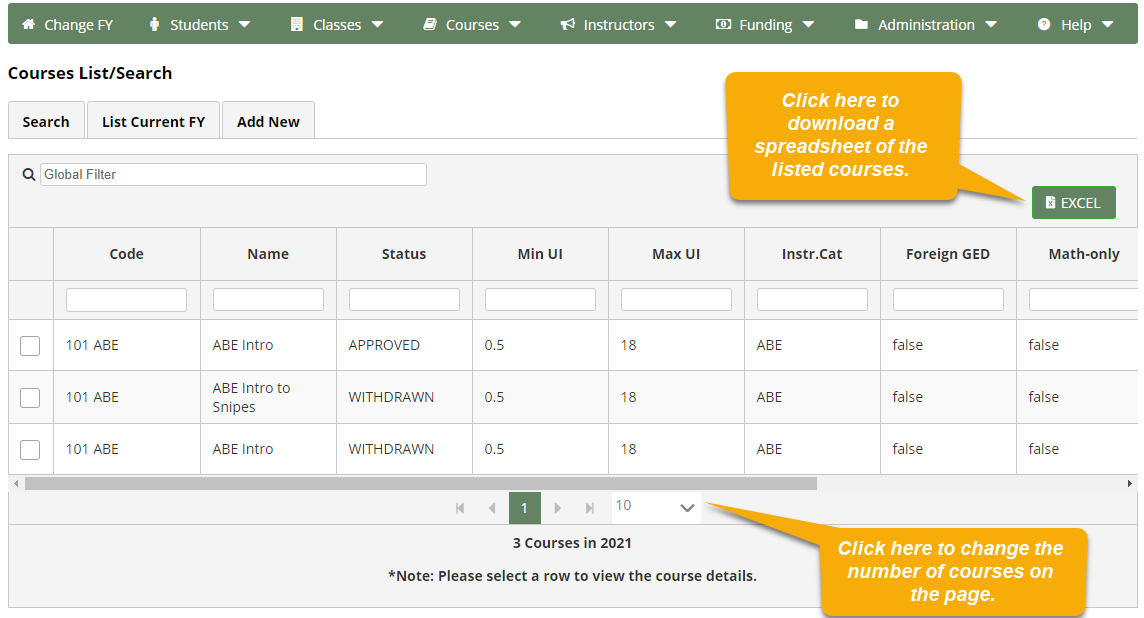
Once you’ve completed your search, a list of courses with your specified criteria will appear. By default, 10 courses will appear on the page. You may use the drop-down menu at the bottom of the screen to increase the number of courses displayed on each page. You can also select the arrows to scroll to the next or previous page of courses.
Click the Excel button to download a spreadsheet with all of the courses in the list.
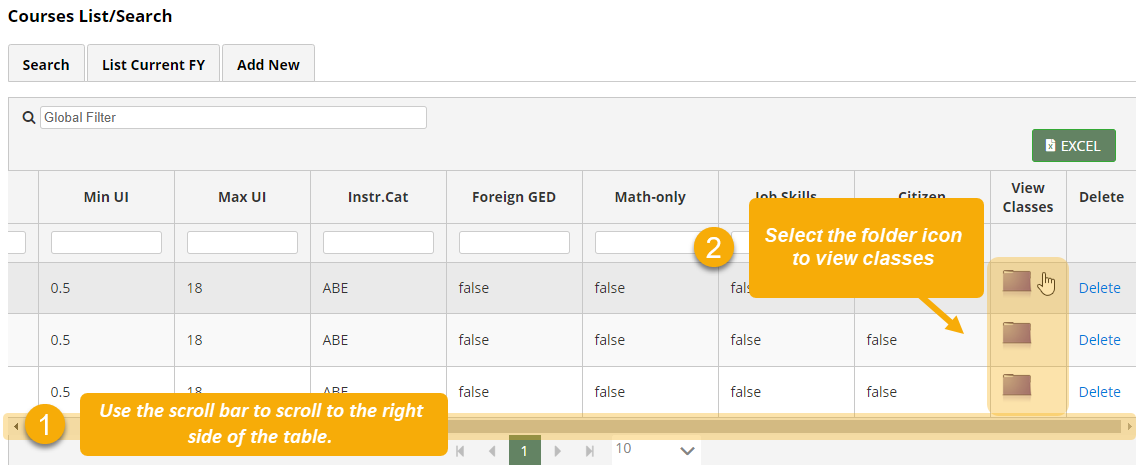
Below the last course on the list, there is a scroll bar you can use to view both sides of the table. By scrolling to the right side of the table, you will see a column of purple folder icons. Click on a folder icon to view the classes within a course.
You will also see a column of Delete links. Click on a delete link to delete the given course.
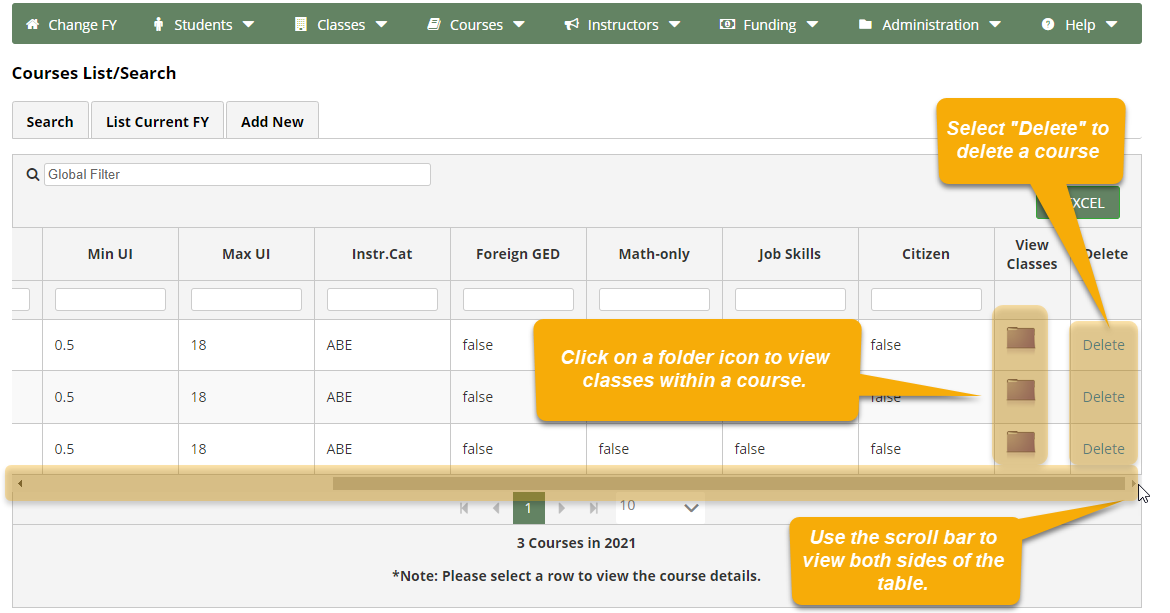
Note: Courses can only be deleted if they have not yet been associated with any classes. If classes have been connected to a course, it is not possible to delete the course from the system.
Edit Courses
Once you’ve found the course you’d like to edit using the Search/List feature (see the Courses: List/Search section of this manual for more information), click on the course to edit it.

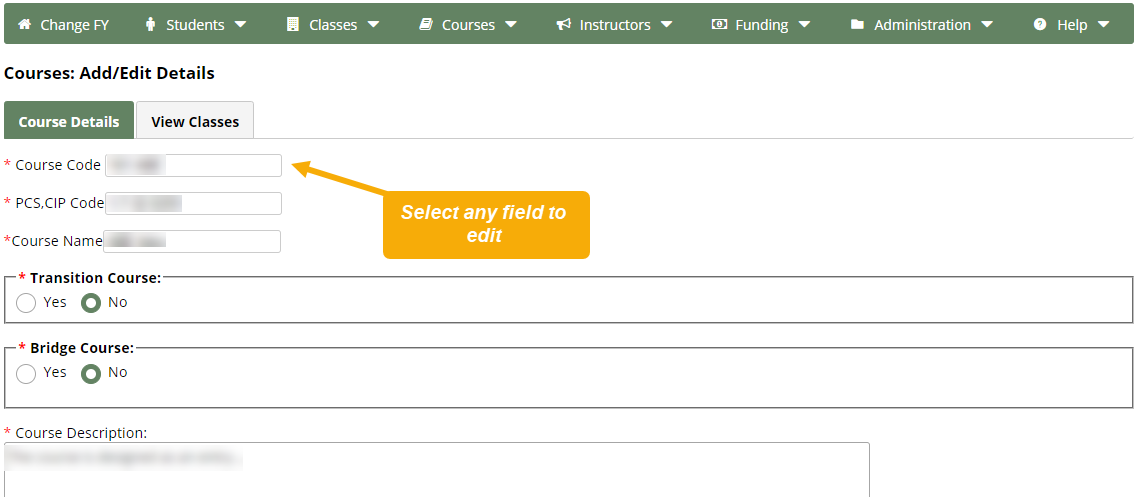
You will be taken to the Courses: Add/Edit Details page. Select any field to edit information as necessary. Click submit when you are finished.
When you hit submit, you will be asked to confirm ICCB approval for the course. Click Continue if you have ICCB approval, or Cancel if you do not yet have approval.
Note: Prior to classes being associated with the course, the course detail information can be changed as needed. However, once a class is associated with the course, the information available to be updated is limited. For example, Course Instructional Categories cannot be changed due to classes being associated with the course.
If your edits were saved successfully, a green prompt will appear to confirm your changes.

View Classes
There are two ways to view classes associated with a course:
- After completing a course search, use the scroll bar at the bottom of the table to scroll to the right side of the table. Then, click on the folder icon in the View Classes column for a selected course to provide a list of classes associated with that course.
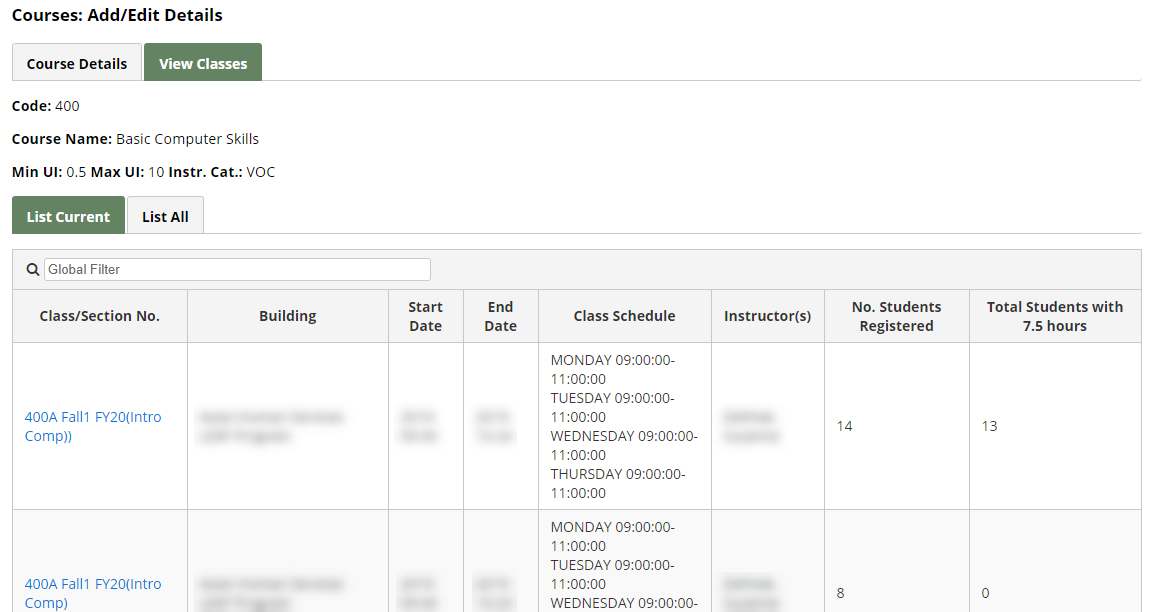
2. Click the View Classes tab on the Courses: Add/Edit Details page to view the classes that have been assigned to the course.

Once the list of classes is displayed, clicking the link on the class/section number will display general information about the class and transfer you to the Classes section of the system. Please refer to the Classes section of this guide to learn more about classes.
Was this page helpful? Let us know.