Table of Contents
General Information
There are three functions provided under the Students tab:
- List/Search
- Add Students
- Set Defaults

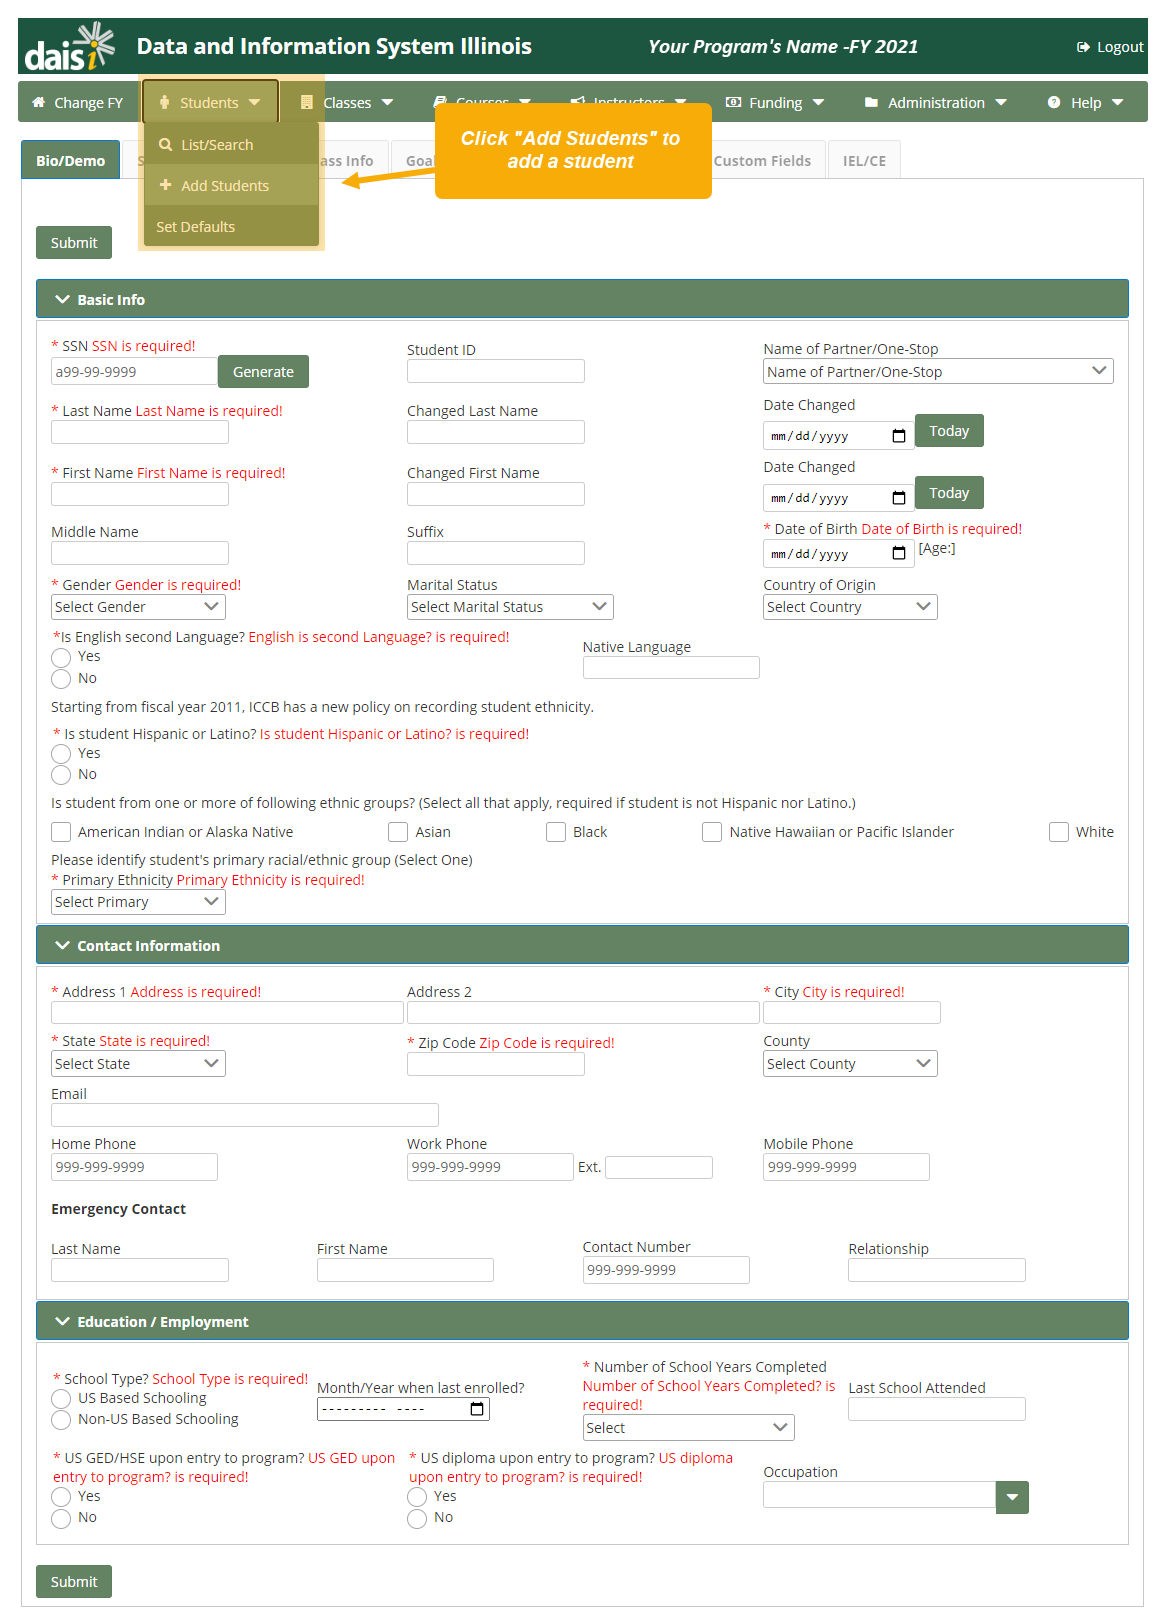
Add Students
Students are added by entering the appropriate required biographic/demographic data after selecting the Add Students link from the menu under the Students tab.
Student information is divided into sections to help streamline the data entry process. Default values can be set for fields to avoid repetitive data entry for your program. Refer to Students – Set Defaults section of the online help for details on setting student defaults.
Required fields are marked with a red asterisk (*) and are in red text.
To add a student to the system, you need to complete the Bio/Demo tab of the Add Student page. Upon completion of the Bio/Demo tab, the student will be added to the system, but the student’s record is not complete for a given fiscal year until the other pages of student information is complete.
Student data is comprised of multiple pages:
- Bio/Demo
- Status
- Test Info
- Class Info
- Goals/Achievements
- Student Notes
- Custom Fields
- EL/Civics
Note: Some areas may not be applicable to certain students.
Bio/Demo
The Bio/Demo student page is categorized into several small categories for sorting and organization of information.
Basic Info
All available information should be added for each student. Required fields are denoted with a red asterisk (*).
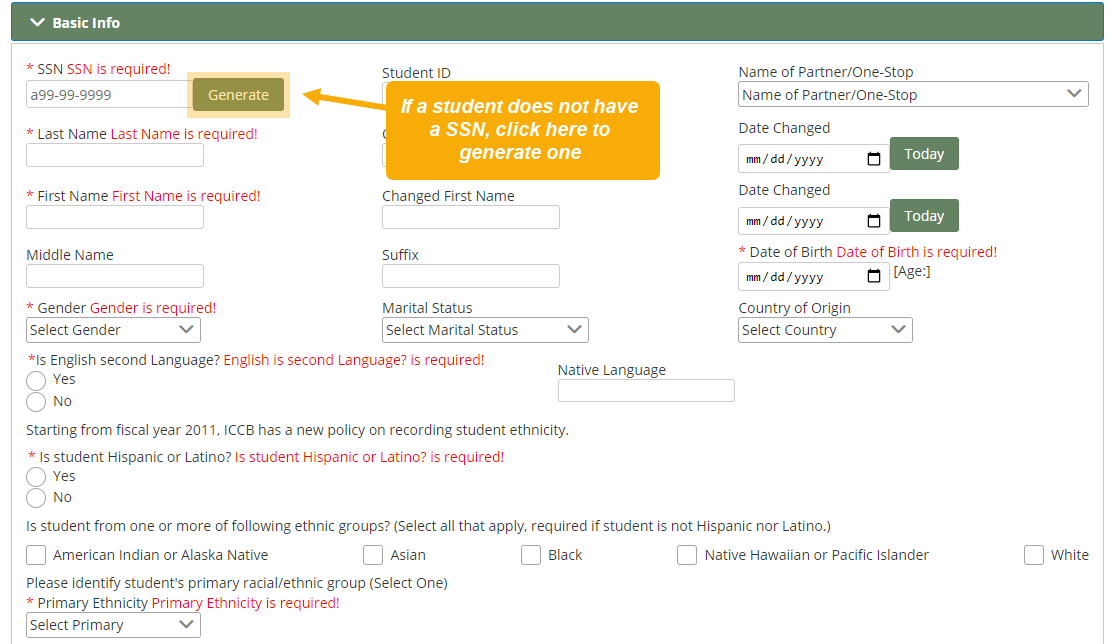
If the student has a valid social security number, it is important to enter it here in order to allow the student’s achievements to be captured via statewide data matching. If none is available, then one can be generated by clicking on the generate link next to the input box. This generated number will be a combination of alpha and numeric characters and will be unique for each student.
Student ID can be entered for programs who assign Student ID numbers.
Last name and first name are text fields. Changed last name can be used in cases where the last name of the student is changed. Keep the original last name as it is, and enter the changed last name in the Changed Last Name box, and enter the date of the change in the Date Changed box.
Enter the date of birth – no separators are needed since they will be entered for you by the system. The date format is mm/dd/yyyy.
Select the student’s gender, English as a second language, and complete the ethnicity information using the options provided. Additionally, other fields can be completed when applicable and if desired.
The system will check for duplicate student records as you tab through social security number, last name, and birth date fields. A warning message will be displayed if a potential duplicate is found.
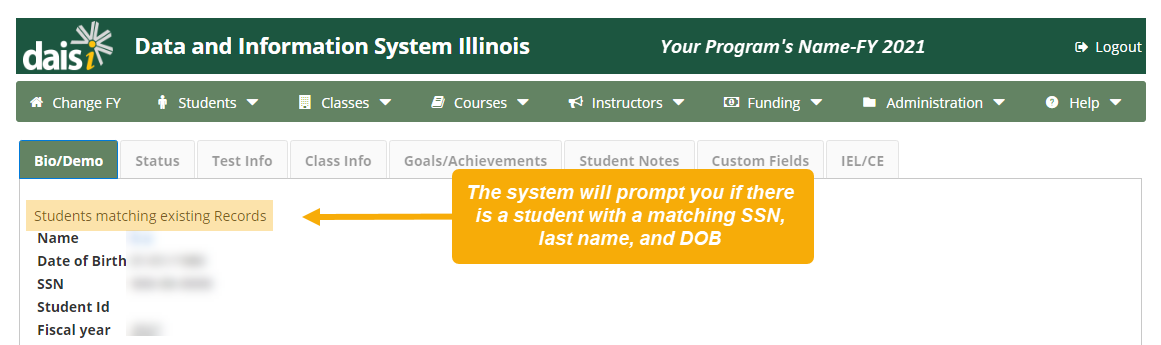
Note: The system will not allow two records with identical SSN fields.
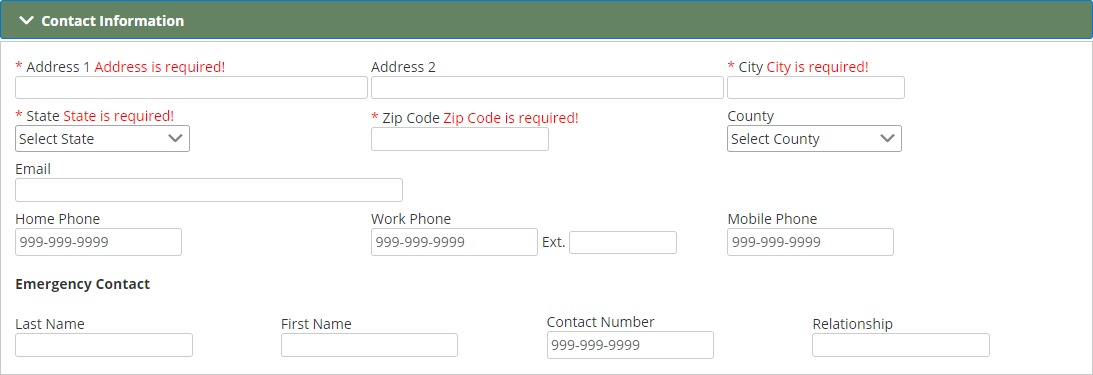
Contact Information
Address information is required for each students, while phone numbers, email addresses, and emergency contact information are optional.
Education/Employment
Supply the answers to the questions, paying careful attention to the required ones. Complete the School Type, Number of School Years Completed, US GED upon entry to the program, and US diploma upon entry to the program fields, as they are required information for all students.
Last school attended and Occupation are optional fields. To find an Occupation in the list, start typing or expand the drop-down menu to the right of the Occupation field to view the options.
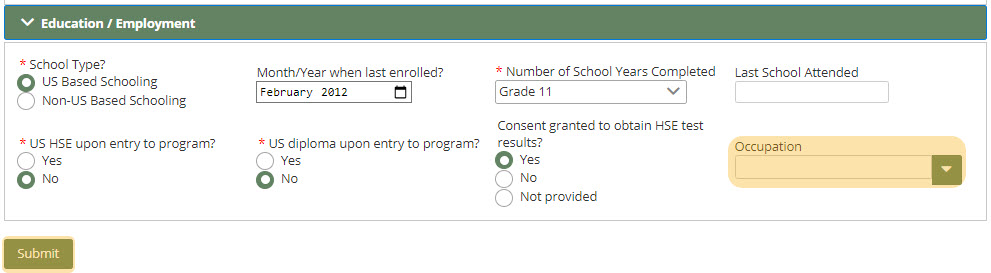
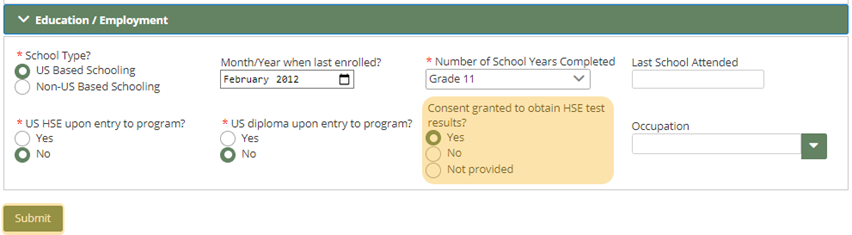
HSE Consent
Adult education providers must obtain a student’s signed approval as proof of consent to view their HSE scores. Examples include a signed Consent to Obtain High School Equivalency (HSE) Test Results (see Appendix C of the Provider Manual) or Student Intake form stating the student consents to sharing their scores with the adult education provider. Maintenance of these records must be in accordance with Section 12 of the Adult Education Provider Manual.
Until you indicate, using the Consent granted to obtain HSE test results? field, that a student has granted your program consent to view their HSE scores, their HSE scores will be hidden from both the student-level HSE Reports and the student’s Test Info page. The student’s HSE results will still be reflected on all aggregate reports, including the NRS Performance PoP Report, the Program Status Report, and the Student HSE Summary Match by Month Report.
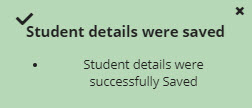
When all of the student data has been entered, click on the Submit button to save.
If the student’s record was successfully saved, a confirmation prompt will appear.
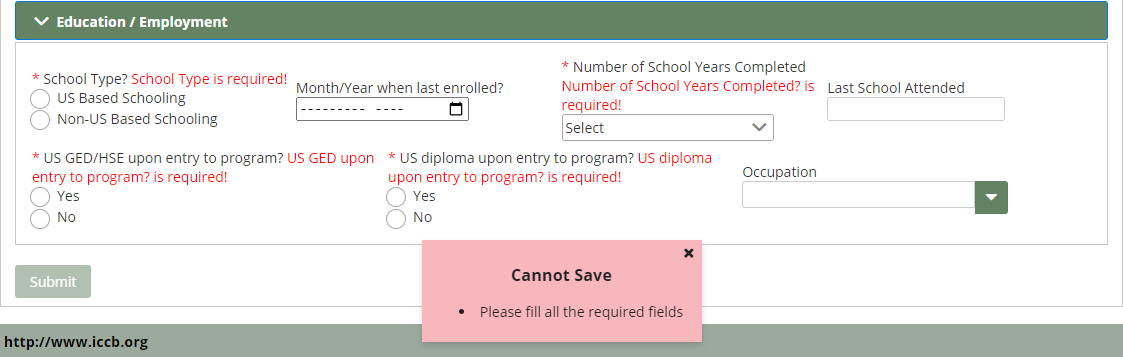
If there are errors or issues with the data entered, an error message will be displayed, and erroneous fields will be highlighted with red prompts.
To add another student, select the Add Student under the Students tab in the Navigation tab, and repeat the process.
Note: Do NOT erase the most recently saved student’s data and replace it with a new student’s data in attempt to add a new student. The old student’s data will be overwritten and lost.
To view an instructional video that shows you how to pre-set values in order to enter students more quickly, click this link: https://youtu.be/i_PKTTj5vLg
List/Search
To access the Student List/Search screen, select the List/Search option from the menu under the Students tab.

The Student List/Search feature works similarly to the other search features on the site. There are two options on the List/Search sub-menu: Search and Add New. Click Add New to go to the Add New students page. For more information on this page, visit the Students: Add Students section of this guide.
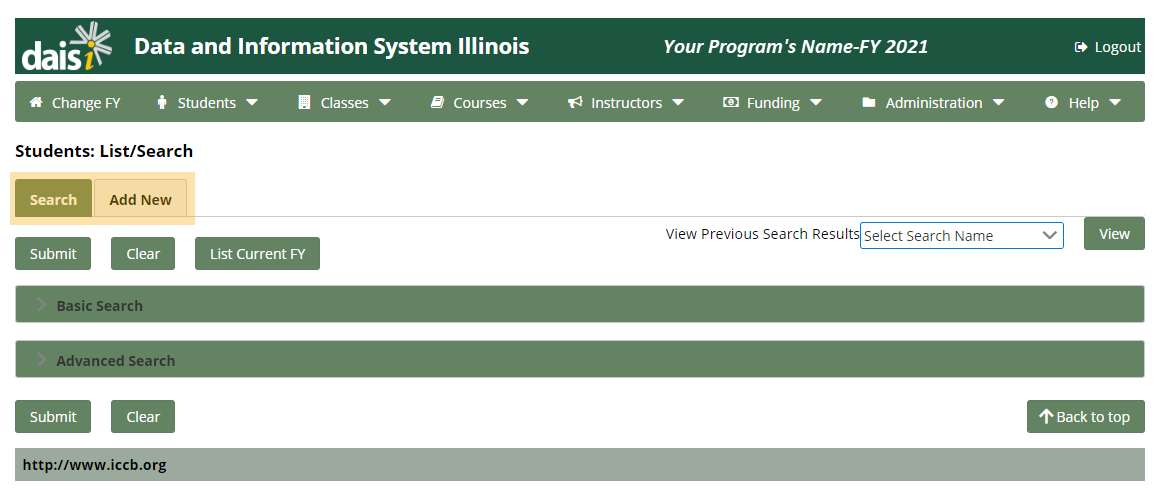
On the Search tab, there are several features:
- Submit: Completes your search
- Clear: Deletes all information in all fields
- List Current FY: Displays students who are enrolled in classes in the selected fiscal year without regard for additional search criteria.
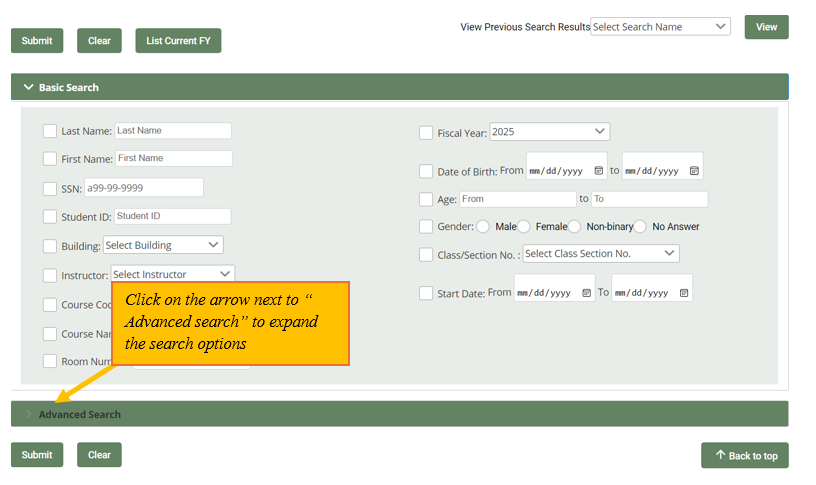
Search Criteria
The search option in the List/Search feature for students is much more extensive than in other areas of DAISI. Basic search fields are available on the screen by default. In addition, an Advanced Search button is provided to enable more detailed search possibilities. Click the Advanced Search arrow to expand and collapse the advanced search options.
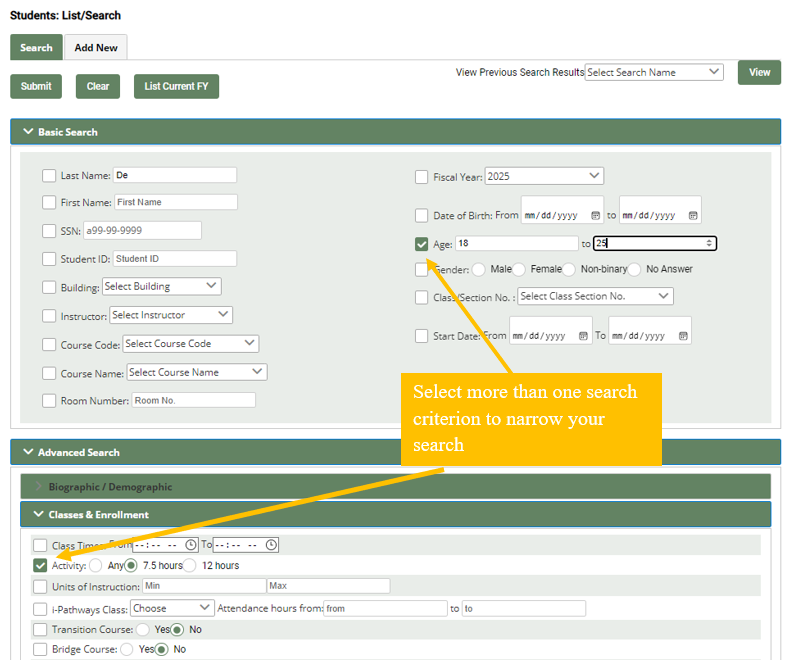
Note: Most search options can be used in combination with one another to maximize search result possibilities. Basic search options can also be combined with advanced search options when executing a search.
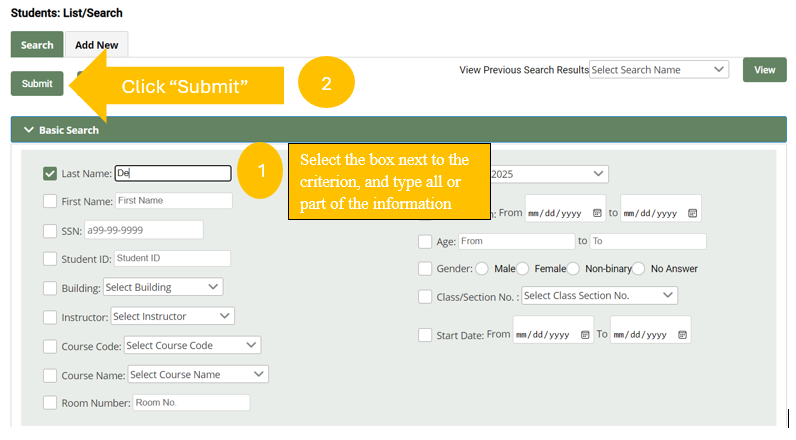
To search on a specific field, such as last name, click on the box in front of last name and type the first letter(s) of the name to search for and click Submit.
To search using multiple fields, click on the box in front of each field you wish to include in the search. Expand the advanced search options if necessary and click any additional boxes for search criteria. Next, enter or select the search criteria details for each box checked and click the Submit button to view search results.
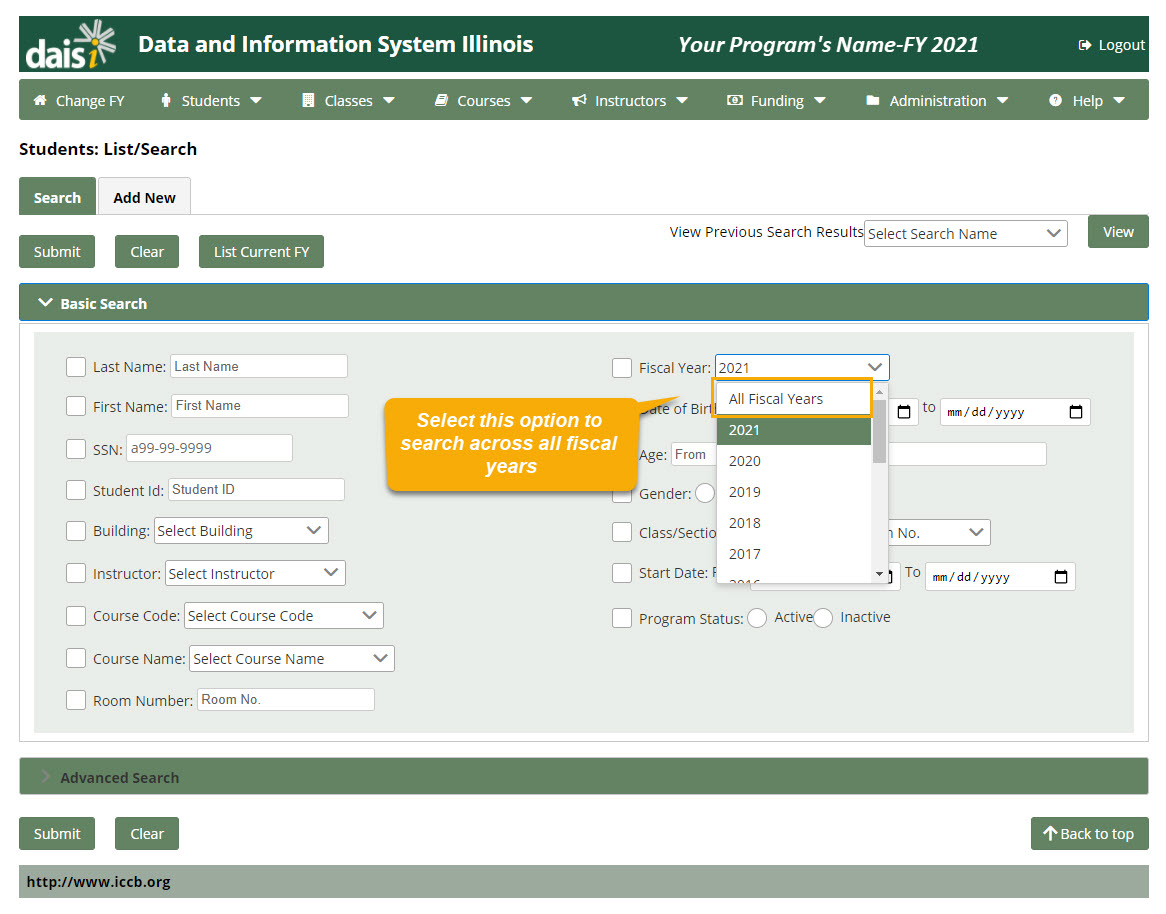
Search Across Multiple Fiscal Years
To search across multiple Fiscal Years, select the “All Fiscal Years” option from the Fiscal Year drop-down menu:
Pandemic Search
You can use the Pandemic Search area within the “Advanced Search” bar to search for:
- Students who were enrolled in classes during a pandemic-induced closure
- Students who are missing a pre-test due to a pandemic-induced closure
- Students who are missing a post-test due to a pandemic-induced closure
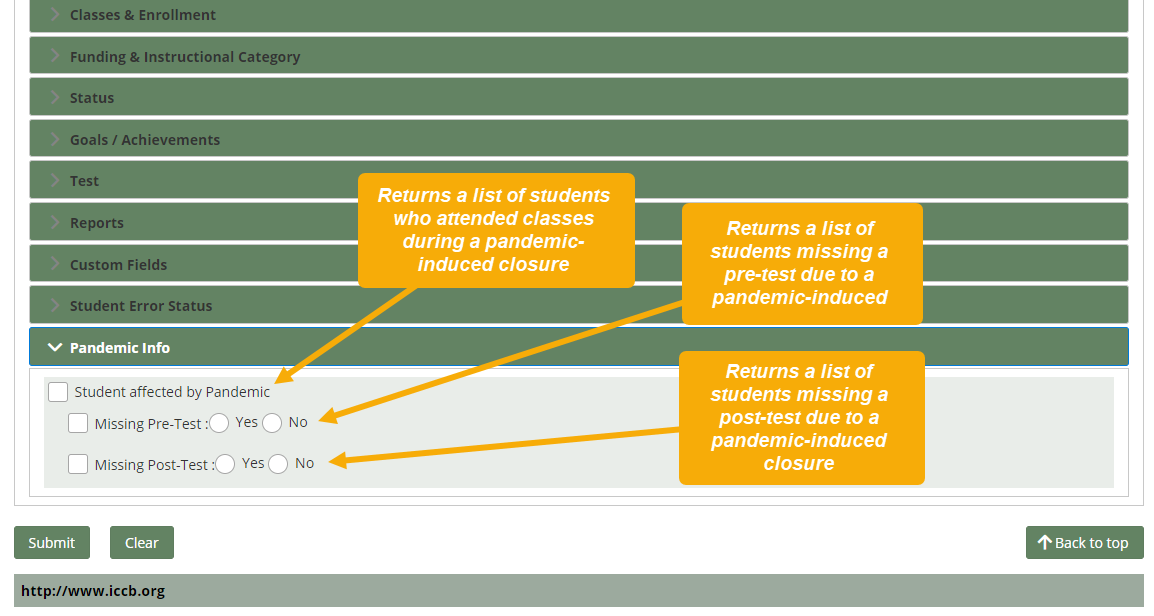
The search will return a list of students who match the criteria you selected. Information about how a specific student was affected can be found on their Test Info page.
The students matching the selected criteria will appear in list form on the page. The students are listed in alphabetical order by last name and the results are broken up into lists of ten students each by default.
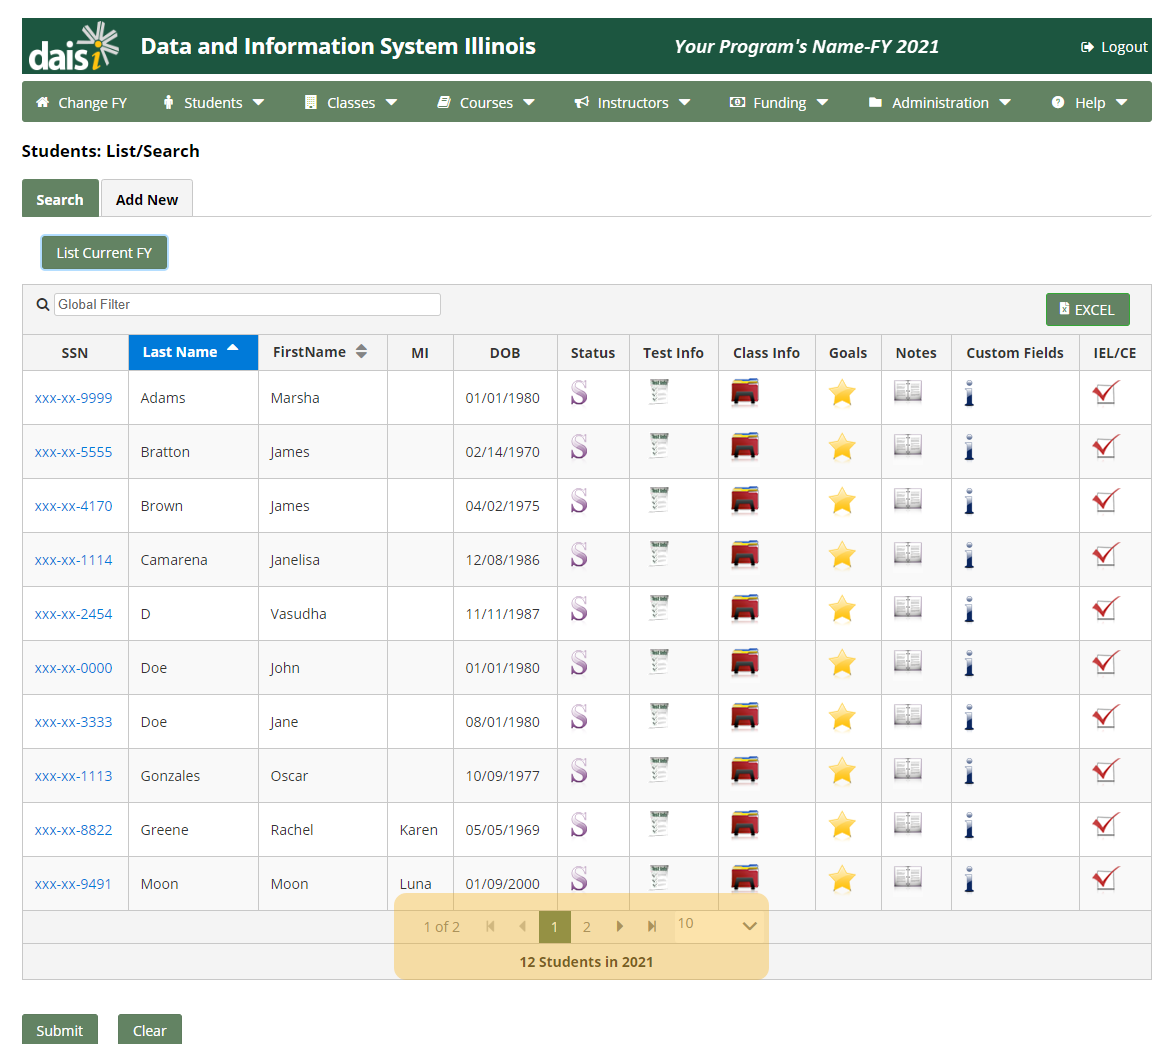
To increase the number of students displayed in the list, select the desired value from the ‘Records per page’ drop-down list. The search results will automatically refresh and the selected number of records will be displayed.
You can use the arrows next to scroll to the next or previous pages. At the very bottom of the list, the number of students in the list during the given fiscal year is displayed (ex. 12 students in 2021).
The search criteria are listed at the bottom of the screen and the list can be refined by altering search criteria and clicking the SEARCH button again.
Note: The search criteria are cleared after each search.
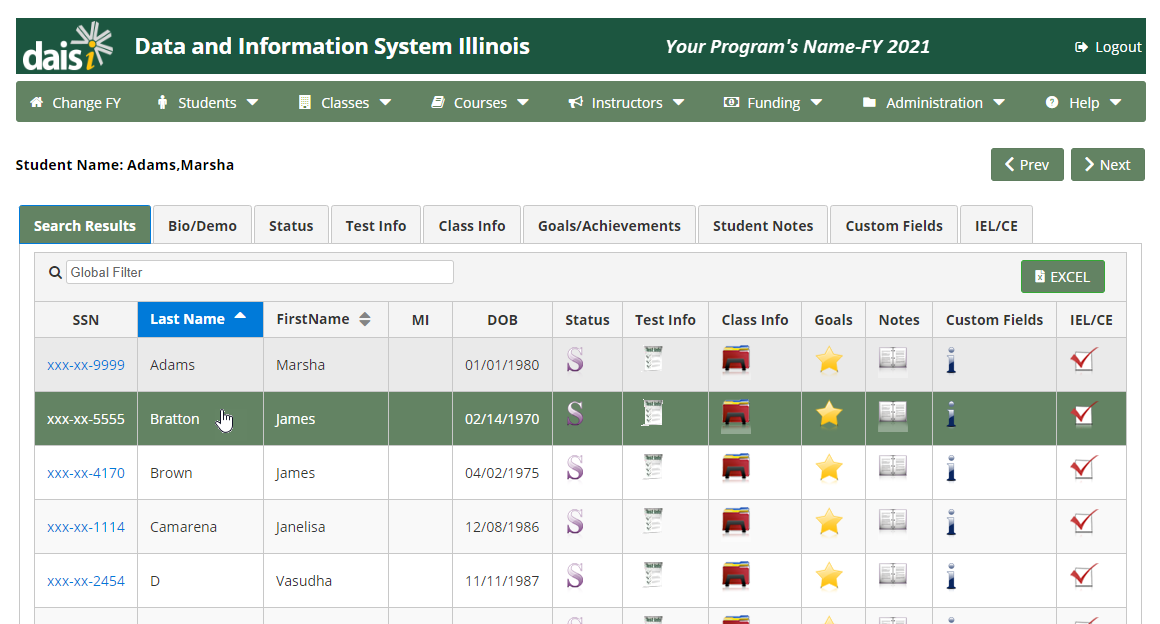
Search Results
The students matching the selected criteria will appear in list form on the page.

Clicking on the name link of the student will bring up the student’s record for view and editing. Refer to the Students: View/Edit section of this guide for details. Each of the icons to the right of the student’s name are quick links directly to the indicated page of the student record. For more detailed information, refer to the corresponding section of the Student guide.
If the student is not located when searching, a new student can be added to the system by selecting Add New from the Students sub-menu.
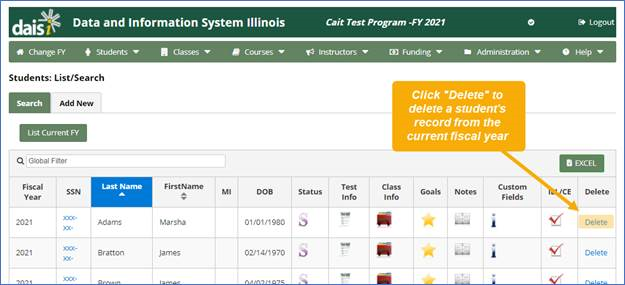
Delete Students
The only time a student record should be deleted is if:
- It was accidentally copied over from a previous fiscal year, or
- It was accidentally duplicated.
In order to delete a student’s record from the current fiscal year, search for their name using the “List/Search” tool described above. Then, use the “Delete” link in the rightmost column of their record. This will only affect the student’s record in the current fiscal year—records from previous fiscal years will remain intact.
View/Edit Students
Clicking on a student name from the Student List/Search page provides the ability to view and/or edit an existing student. The edit student display provides additional navigation options as well.
The student records are split into multiple screens for ease of data entry. Each section is accessible via sub-navigation tabs located directly above the search results. Click on a tab to view the selected selection of student data.
To return to the list of Search Results, click the leftmost tab labeled Search Results.
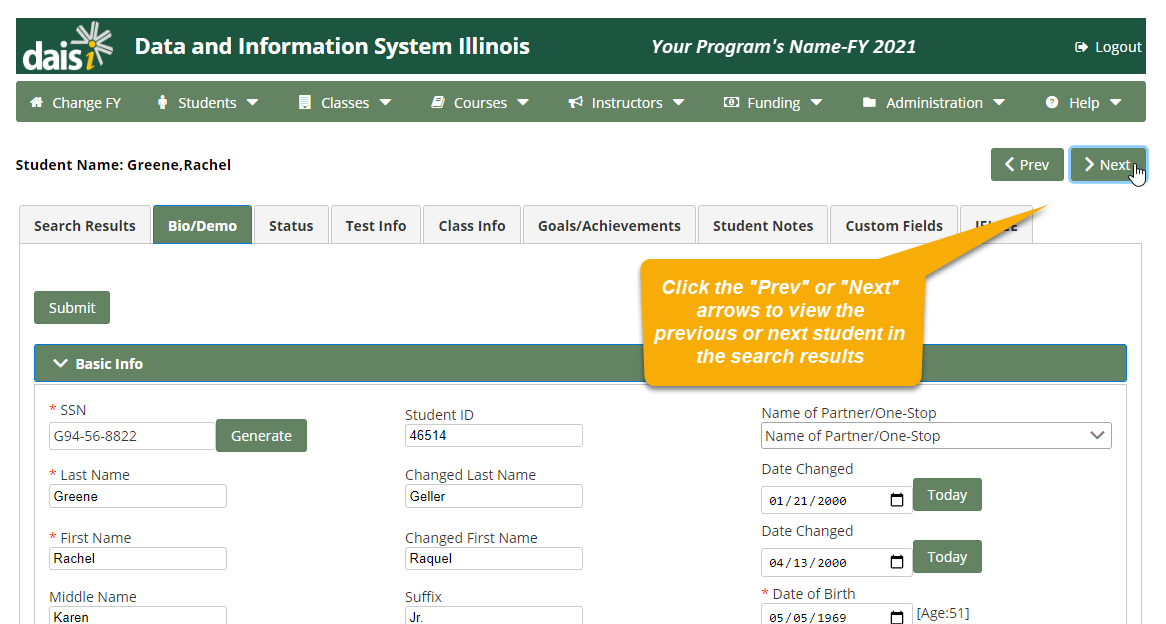
To view the previous or next student in the search results, click the Prev or Next arrows.
Edit Student
Use the student sub-menu to navigate to the page of student data you wish to view and/or edit. For further information on each page of student data, please refer to the corresponding Student sections of the online help (i.e. Students – Status).
Enter or update the student information and click the Submit button to save your changes. Upon submit, a green confirmation message should appear at the top of the screen indicating the system saved the changes. If there are any errors, they will appear in a red outlined box at the top of the page and must be corrected before the updated student information will be saved to the system.
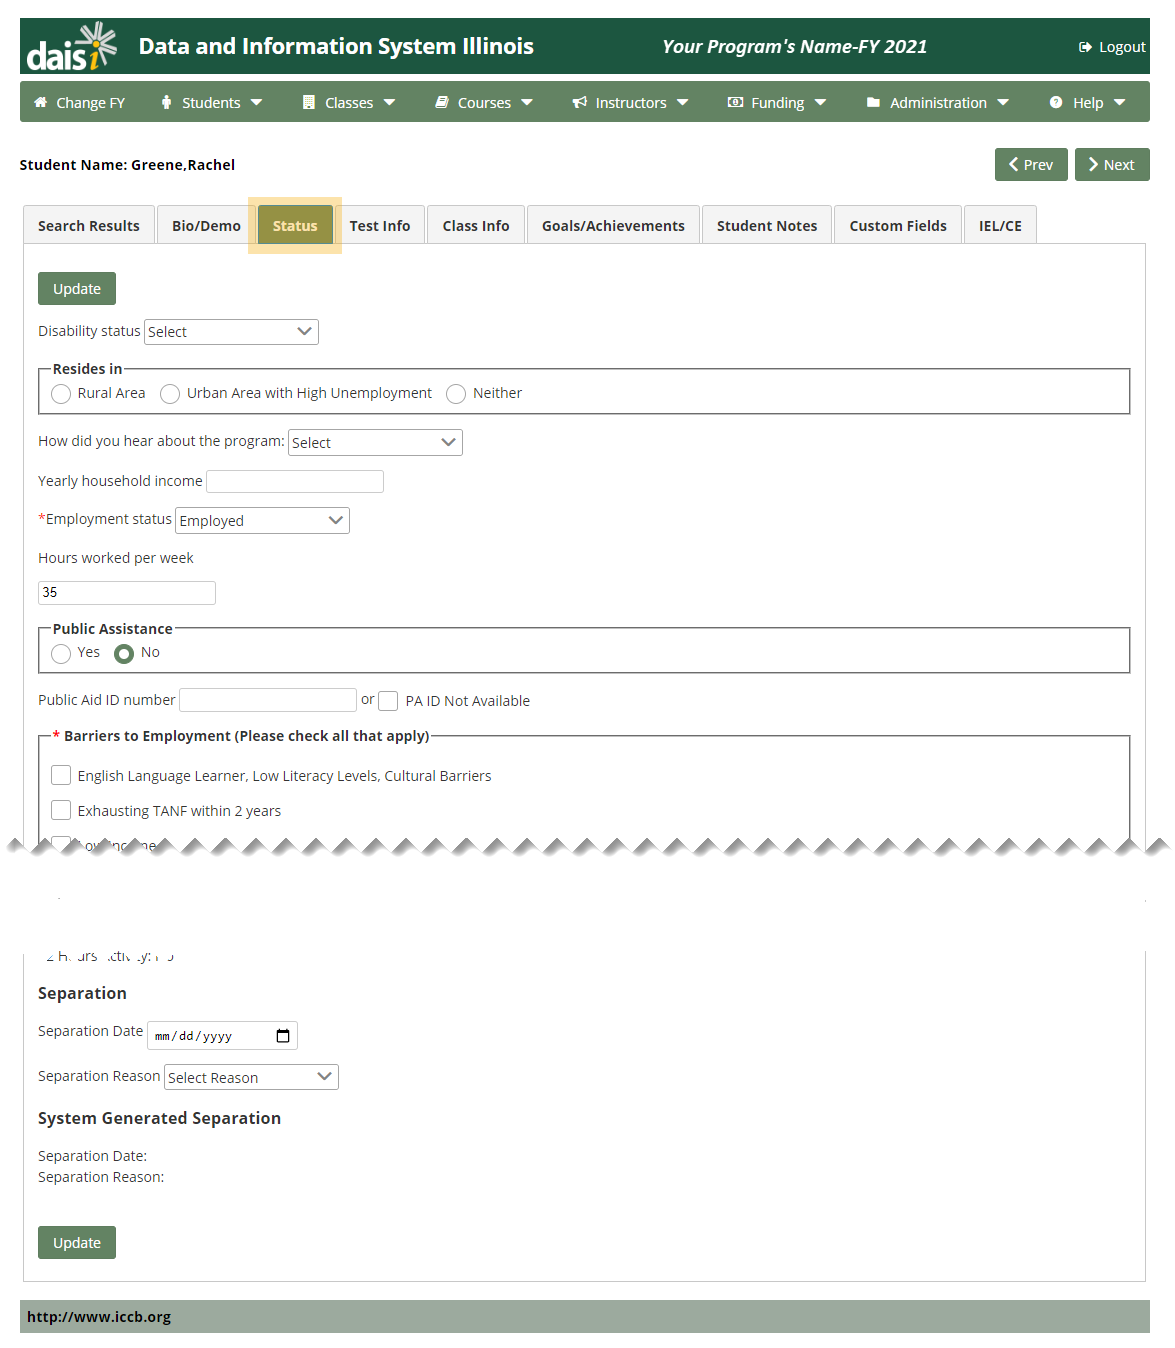
Status
The second screen of student data concerns the status of the student at the time of entry into the program each fiscal year. It is a snapshot of status at the time of entry each year and should not be modified should the student’s status change during the year. Fill in all of the required information using the drop-down lists provided.
Note: Fields are required only when they apply. For example, if the student is unemployed, hours worked per week can be left empty.
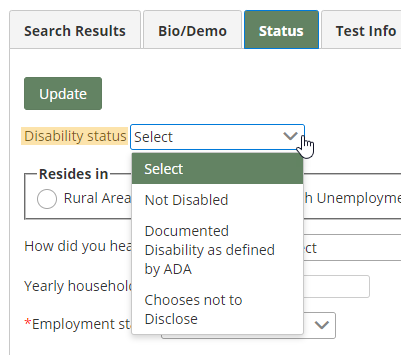
Disabled
To record a student’s disability, select it from the drop-down menu. A student is regarded as having a disability if they have any type of physical or mental impairment that substantially limits or restricts one or more major life activities, including walking, seeing, hearing, speaking, learning, and working. Programs can be informed about a student’s disability through the referring agency or the learner. A program can also assess the student to identify their disability.
Resides In
Please select the appropriate status based upon the student’s area of residence:
- Rural Area is defined as an area that has less than 2,500 inhabitants and is outside an urbanized area.
- Urbanized Area with High Unemployment is defined as an urbanized area that has a population of 50,000 or more in a city and adjacent areas of high density.
- Neither is used when neither of the above definitions apply.
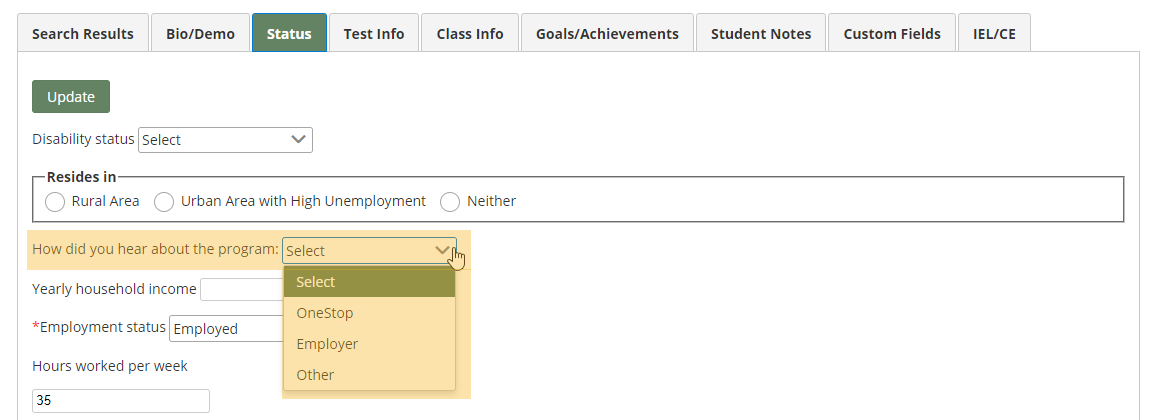
How did you hear about the program
Please select how the student heard about the program from the drop-down list provided.
Employment:
Full and Part-time
Full-time people work 37.5 or more hours per week, while part-time people work less than 37.5 hours per week. This includes learners who work as paid employees, work in their own business or farm, or who work 15 or more hours per week as unpaid workers on a farm or in a business operated by a member of the family. Also included are learners who are not currently working, but who have jobs or businesses from which they are temporarily absent. Hours worked per week must be entered for all employed students.
Select either Full-time or Part-time from the Employment drop-down and enter the number of hours worked per week in the space provided.
Unemployed
Learners who are not working but are actively seeking employment. The individual has made specific efforts to find a job and is available for work.
Not in Labor Force
Learners who are not employed and are not actively seeking employment.

Public Assistance
Select whether or not the student is considered Public Assistance using the yes/no radio button option.

If the student receives public assistance, a 13-digit ID number is required. Enter the PA ID number, even if it is not categorized as “approved”.
The ID number will be validated and the student will automatically be classified as “approved” or “other”. Both classifications are eligible for public aid funding when enrolling in a class, but the units of instruction for students with “other” non-approved ID’s will be placed in the 10% category on the Public Aid Master List. Only students with “accepted” ID’s will have their units of instruction included in the 90% category. 90% of the units of instruction generated and claimed for public assistance funding must be used to serve students in the eligible categories.
To assign students to public aid funding in the 10% category when they do not receive public assistance, select “Yes” and “PA ID Not Available”.
Additional Student Information
Select the additional student information by checking all boxes which apply to the student. Options include: Low Income, Dislocated Worker, Displaced Homemaker, Veteran, and Single Parent.
Low Income
The learner receives or is a member of a family who receives a total family income in the 6 months prior to enrollment of 70 percent of the income level standard for a family of that size, or the learner is receiving or is a member of a family who is receiving cash assistance payments from Federal or State agencies or food stamps, or the learner can be designated as homeless under the McKinney Act.
Dislocated Worker
An individual who receives an individual notice of pending or actual layoff from a job, or an individual who receives a publicly announced notice of pending or actual layoff.
Displaced Homemaker
Learner has been providing unpaid services to family members in the home, has been dependent on the income of another family member but is no longer supported by that income, and is unemployed or underemployed and experiencing difficulty obtaining or upgrading employment.
Enrolled In
Place check marks in any/all applicable boxes.

Correctional Facility
The student is enrolled in an ICCB AEFL funded class offered within a correctional facility. A correctional facility is defined as any prison, jail reformatory, work farm, detention center, or any other similar Federal, State, or local institution designed for the confinement or rehabilitation of criminal offenders. At least 51% of the direct instruction costs are funded by ICCB AEFL dollars.
Community Correctional Program
The student is enrolled in an ICCB AEFL funded class offered within a community-based rehabilitation facility or halfway house. At least 51% of the direct instructional costs are funded by ICCB AEFL dollars.
Other Institutional Setting
The student is enrolled in an ICCB AEFL funded class offered within any other medical or special institution program besides homeless, community corrections, or corrections program. At least 51% of the direct instructional costs are funded by ICCB AEFL dollars.
STAR Student
Indicate if the student is classified as a STAR Student using the yes/no option provided.
Students can be marked as a STAR student if they meet the following criteria:
- The STAR student has been diagnostically assessed in all four reading components.
- A Learner Profile has been developed for the STAR student.
- The STAR student is receiving evidence-based reading instruction taught by a teacher who has received STAR training.
Evidence-based reading instruction includes reading being taught through direct and explicit instruction in the components indicated as areas of need with materials at the appropriate instructional levels.
Transportation
These are optional fields that can be used to track the need for and use of transportation assistance. Place check marks in any/all applicable boxes.
Accommodation
Check the box if the student has received an accommodation.
Activity
The system automatically identifies the activity status for each student. No data entry is required.
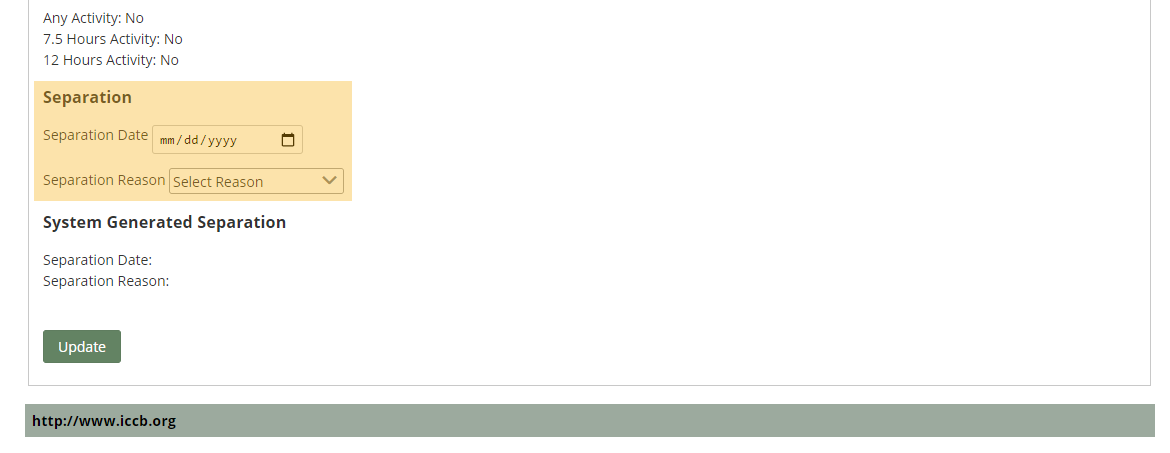
Separation
A separation should be entered when a student leaves the program for any reason. This differs from a class exit, as a student my exit one or more classes but remain enrolled in the program. Only a separation signifies that the student has left the program. Enter the date the student separated and select a separation reason from the drop-down menu provided.
Separations are very important to enter when students become inactive because (per NRS guidelines) follow-up outcomes are only measured for students who are separated from the program. If a separation is entered and the student then returns, the separation does not need to be manually deleted. Entering any activity for the student (i.e. testing, attendance) will automatically re-instate the student’s Active status.
Students should be coded as separating when:
- Instruction ends and the student indicates he or she will not be returning,
- The learner terminates, or
- A student has not received instruction for 90 calendar days and is not scheduled to receive further instruction.
A sample Separation Form can be found in Appendix C of the AEFL Provider Manual to assist providers with the separation process.
Note: The “Met Personal Objective” separation reason should only be selected when the student has met one of the following:
- Post-tested into a higher NRS level and left the program
- Passed the GED Test or obtained a high school diploma and left the program
- Entered postsecondary education and left the program
- Obtained Vocational Completion and left the program
- Obtained U.S. Citizenship and left the program
Appropriate documentation supporting the selection of the “Met Personal Objective” separation reason must be maintained in student folders (i.e. post-tests, GED scores, etc).
Submitting Changes
When each of the required areas is completed, click on Update to save the changes.
If the save is successful, a confirmation message will appear at the bottom of the page. If an error message appears, you will need to correct all errors and click Update again to save the changes. Data is not saved until you receive the confirmation message.
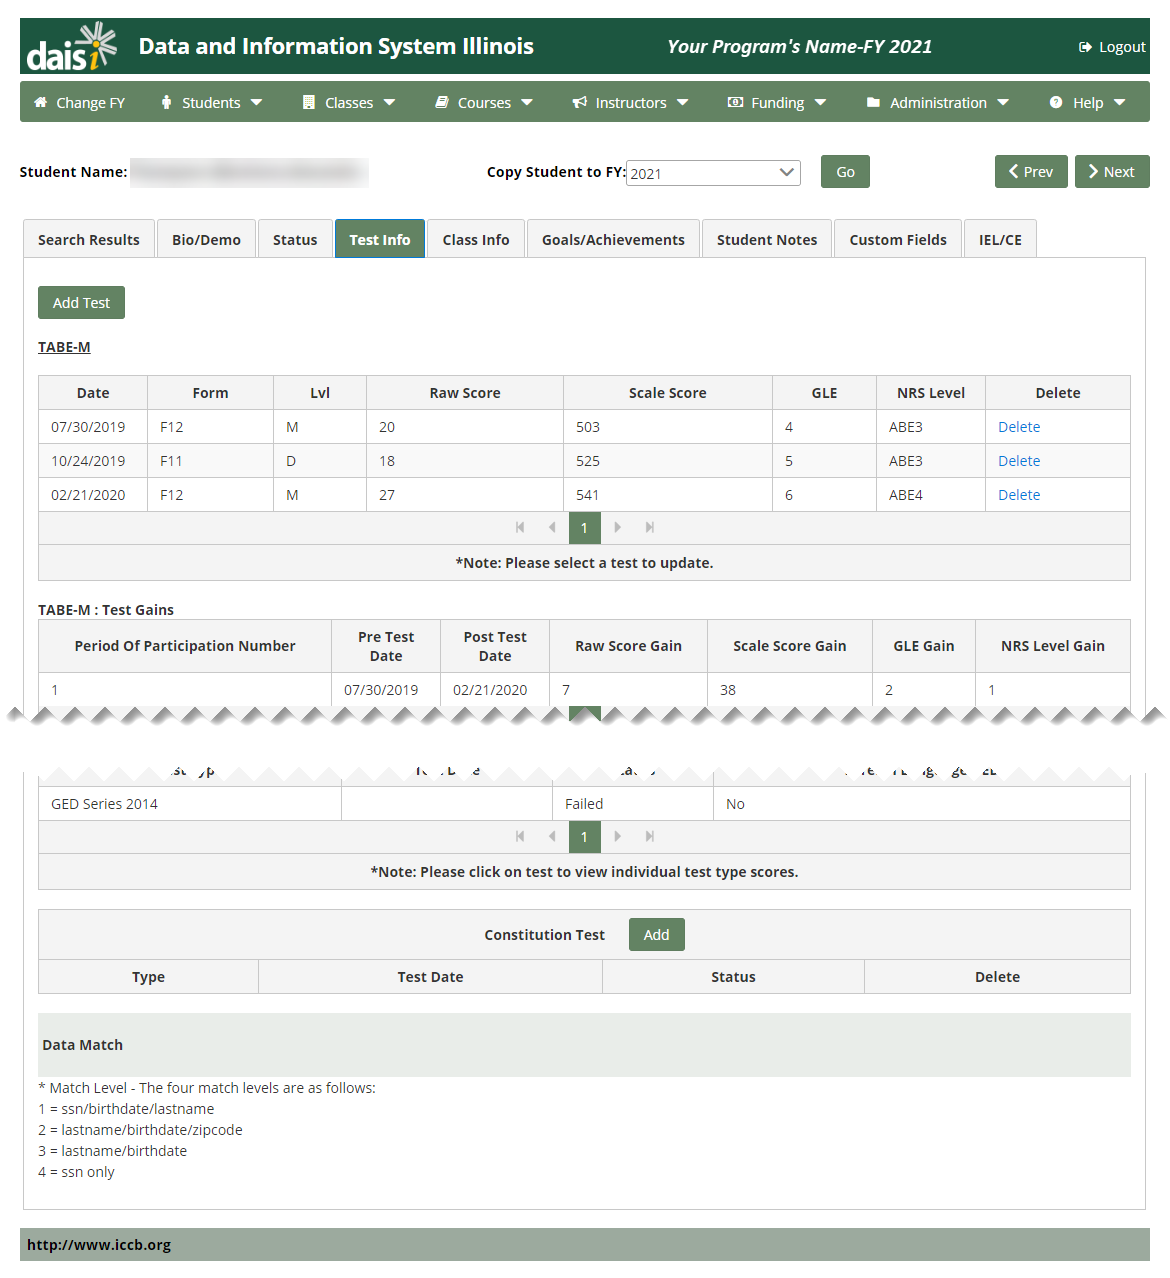
Test Info
The third screen of student data contains test information. All pre, post, and progress tests should be entered here. The system will automatically identify the pre/post-test status.
With the exception of Foreign Language GED and Vocational instruction, students must be pre- and post-tested. The system will generate errors and exclude students from reporting who do not meet policy requirements for inclusion.
Please see Appendix C of the AEFL Provider Manual for a complete description of intake and assessment requirements.
Pandemic Status
At the bottom of a student’s Test Info page, you can find information regarding how a student was affected by a pandemic-induced closure (such as the governor-mandated shelter-in-place order from 03/16/2020 to 06/30/2020). The Pandemic Status table shows:
- Information about tests that are missing due to a pandemic-induced closure
- Dates the student attended during a pandemic-induced closure
- Dates of pandemic-induced closures
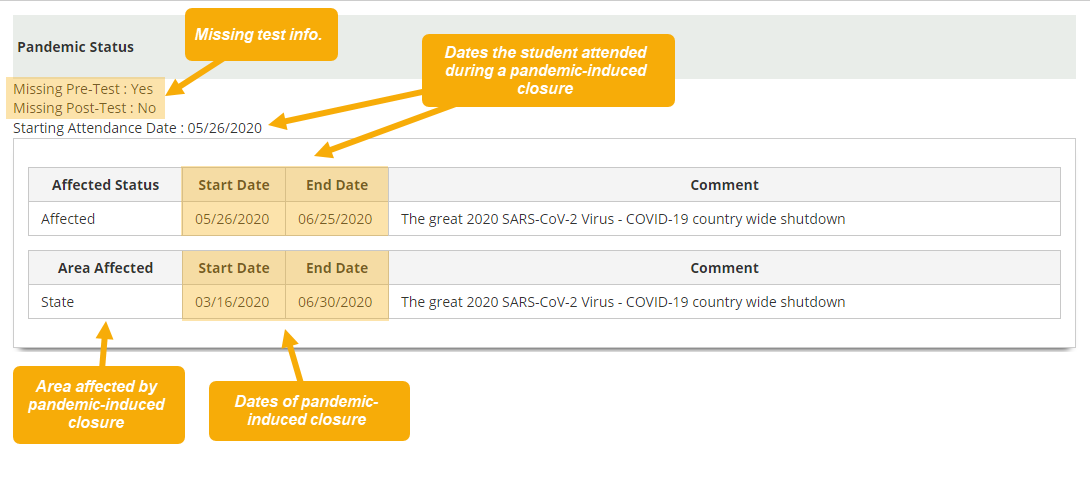
Note: If a student was not affected by a pandemic-induced closure, the Pandemic Status section will not appear on their Test Info page.
Class Info.
The fourth screen of student data displays student class information. As students attend classes and generate units of instruction, this section of their file will present a summary of their participation. It presents a snapshot of classes attended during the current fiscal year, as well as exited classes.
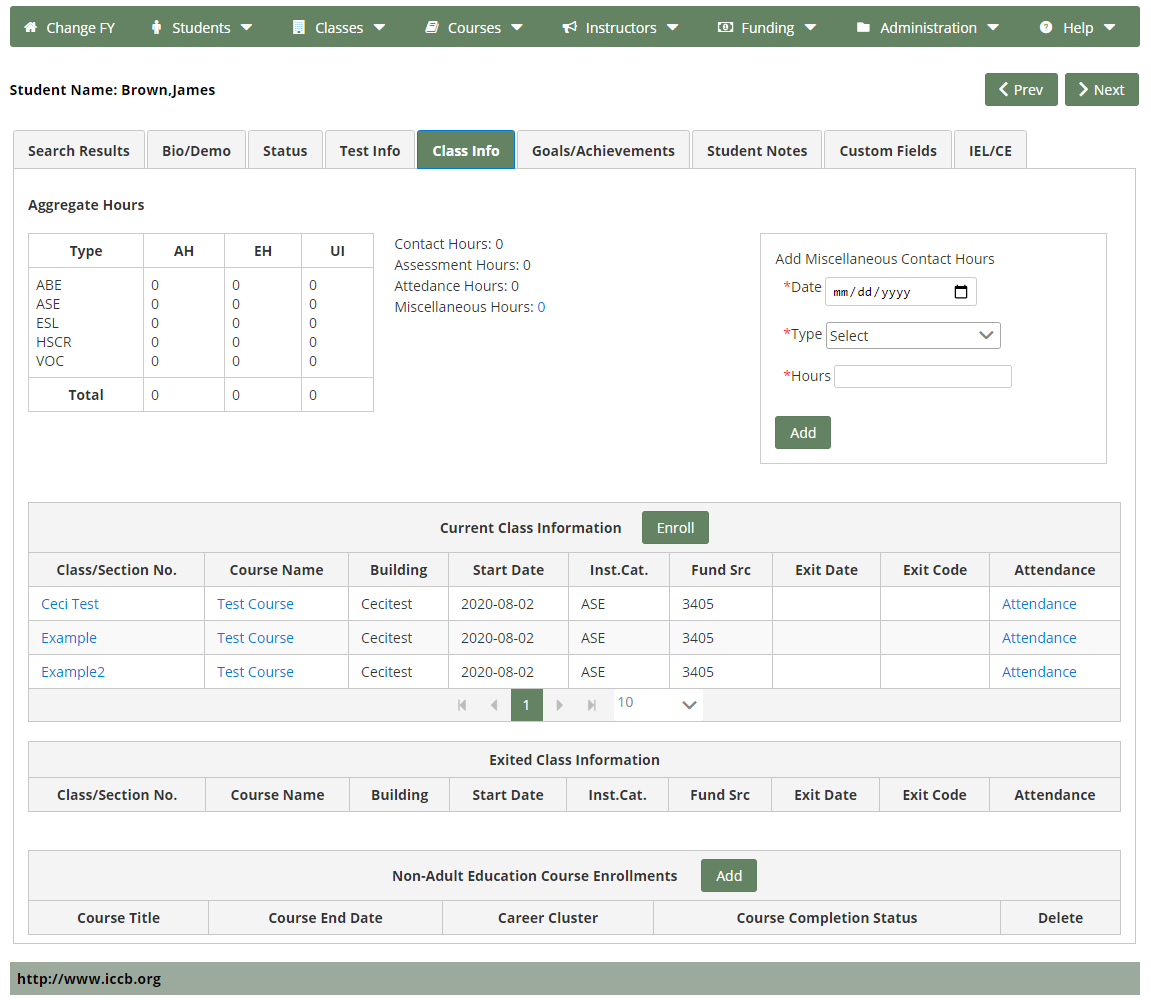
Hours Information
The top half of the display shows the aggregate hours for the selected student. On the left, hours are broken out into instructional categories and totaled at the bottom. These figures include hours for all classes in which the student is enrolled for the selected fiscal year. To the right of the Aggregate Hours table, a display of contact hours for the selected fiscal year is displayed.
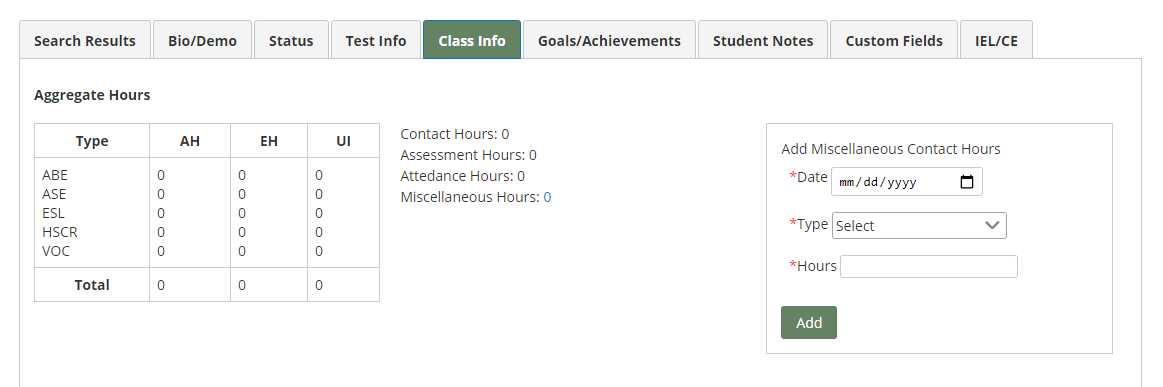
The Contact Hours total includes Assessment hours, Attendance hours, and Miscellaneous hours. Assessment hours are aggregated from the ‘Number of hours (if assessed outside of class)’ field in connection with each progress test entered for the student.
Miscellaneous contact hours can also be added from the contact hours area of the screen. Enter the date, select a type from the drop-down list, and enter the number of hours. Click the Add button to save.
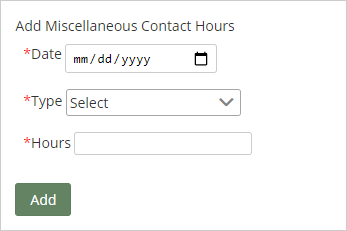
The new totals will reflect the changes. Click on the link for Miscellaneous Hours to display a detailed list of all Miscellaneous Contact Hours entered to-date for the student.
Following are definitions for various types of hours found on this page.
- Attendance Hours: Actual hours attended (seat time)
- Enrollment Hours: Hours enrolled in class (includes seat time, allowable absences, and Given Days).
- Units of Instruction: Enrollment hours divided by 15.
- Contact Hours: Includes attendance hours, time spent testing outside of class, and miscellaneous contact hours (i.e. open lab, tutoring).
Class Information
The bottom half of the Class Info screen displays classes the student is enrolled in for the current fiscal year as well as the exited classes. The student can be enrolled in a new class directly from this screen by clicking the Enroll button.
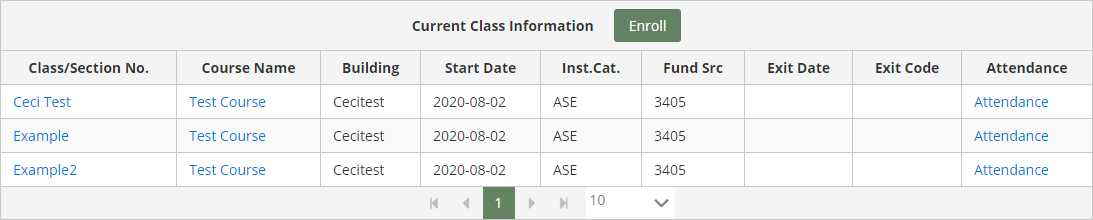
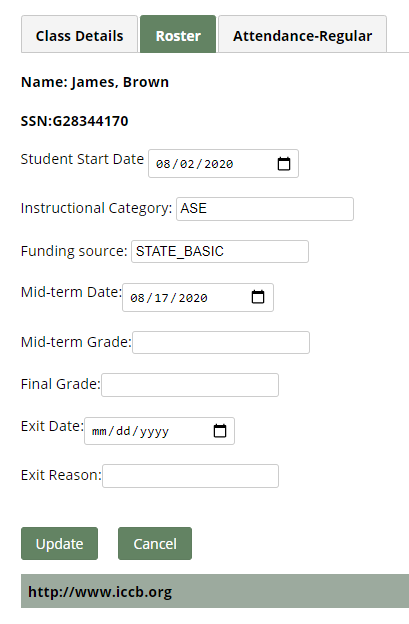
Each class the student is enrolled in is listed on the display. Clicking on the class/section no from this screen allows the user to update the student start date, fund source, midterm & final grades, as well as class exit information. Modify any information and click the Update button to save changes.
To view the course information for the selected class, click the Course Name link.
Attendance information for the student can be entered for each class by clicking the Attendance icon on the right. Only attendance for this student in the selected class can be entered from this display. To enter attendance for all students in a selected class, please refer to the Classes: Attendance section of this guide.
Enroll in New Class
Students can be enrolled in a new class directly from this screen, very similar to enrolling students from a selected class. To enroll the selected student in a new class, click the Enroll button.
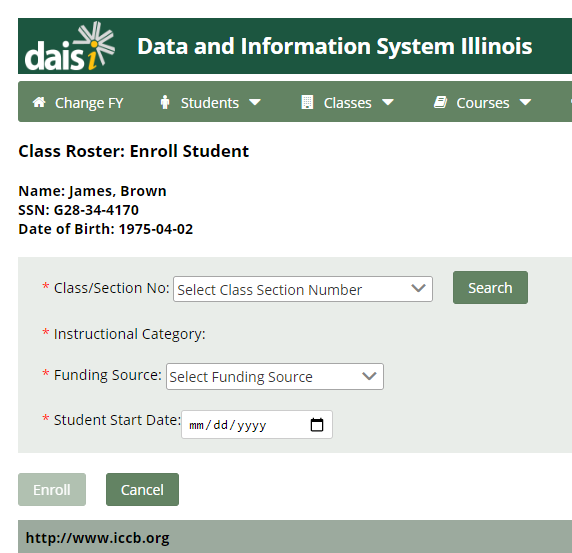
If the Class/Section No is unknown, click the Search button and use the pop-up window to search for a class using the search parameters available. Find an appropriate class in the list and select it to populate the field.
If the class involves only one instructional category, the category will be automatically filled in. If the class serves more than one instructional category, such as ABE/ASE, the system will automatically insert the instructional category if the student has a valid pre-test entered at the time of enrollment. In addition, the funding source will be the default funding source that was set up for the class. If other options are available, they will be listed in the drop-down list for selection.
The Student Start Date will default to the start date of the class. The student start date can be changed manually or the system will automatically update it to the enrollment date when attendance is entered for the student.
Click on Enroll to save the information that has been entered to complete enrollment for the student.
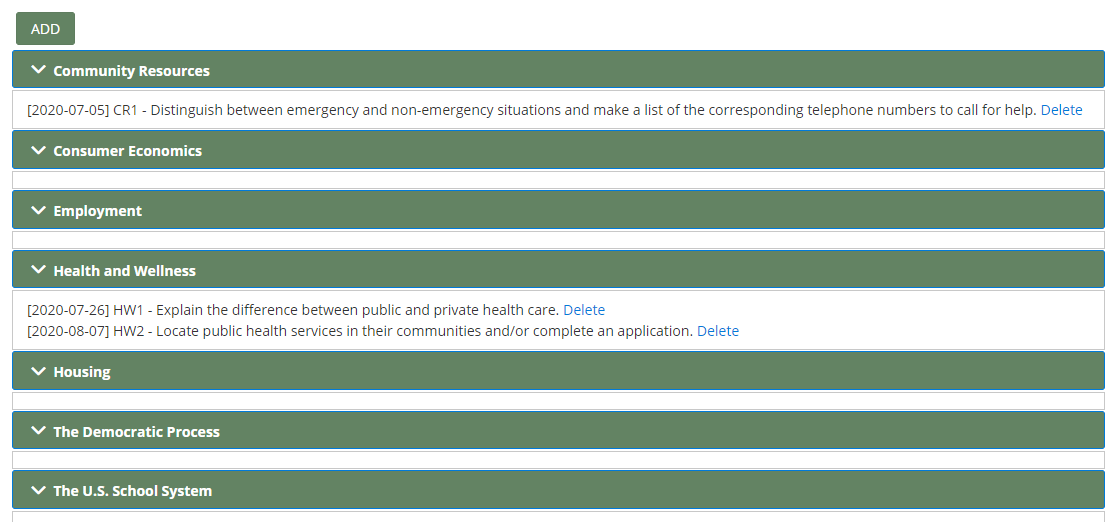
Goals/Achievements
The fifth screen of student data displays student goals and achievements.
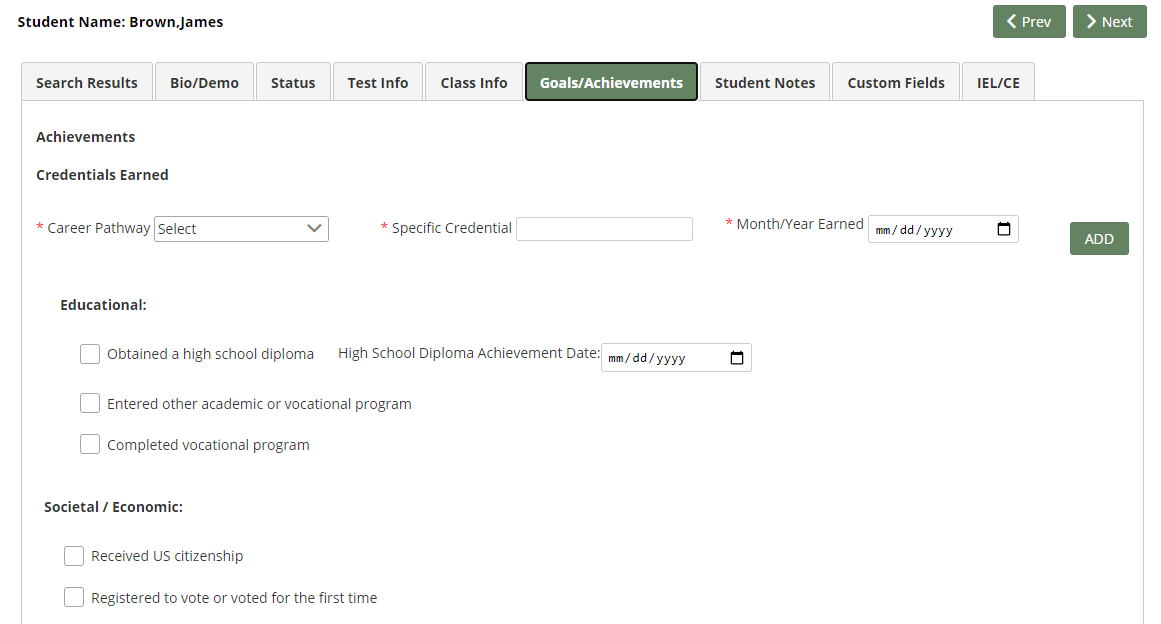
On this page, you can enter your students’ achievements using the field displayed. Items marked with a red asterisk (*) are mandatory. Select all achievements that apply to the student and click Update at the bottom of the page.
Student Notes
The sixth screen of student data is provided to allow space for notes to be entered concerning the student.
Enter a date and any comments and click on the Submit button to save the changes.
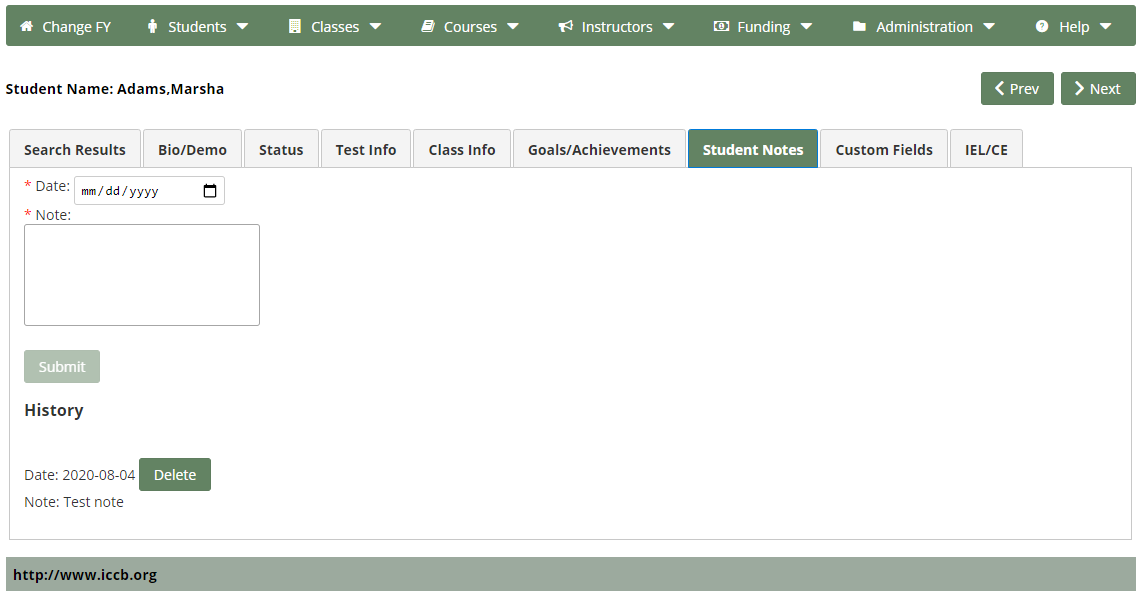
The historical notes will be displayed in the lower section of the screen.
To delete an existing note, click the Delete button to the right of the note date. The delete function is permanent, so please use it with caution.
Student Custom Fields
The seventh screen of student data is provided for recording custom field data. Setting up custom fields allows you to create areas in which to collect data otherwise not collected within the system.
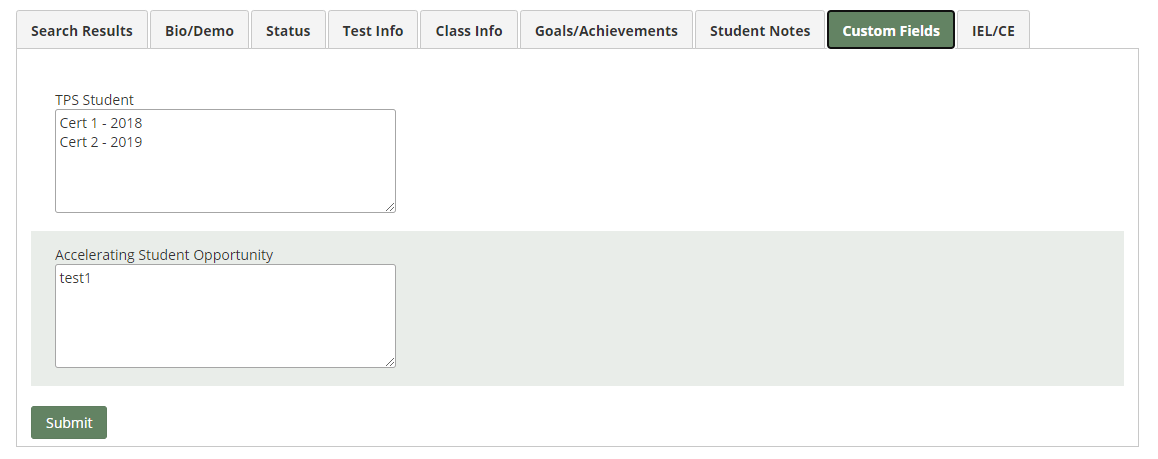
The data for the student custom fields you have established will be entered on this screen. Enter the information in the space provided and click on Submit to save the changes.
Note: The custom fields are defined in the Administration tab under the Utilities menu option. Instructions for setting up custom fields are included in the Administration: Utilities section of the online help.
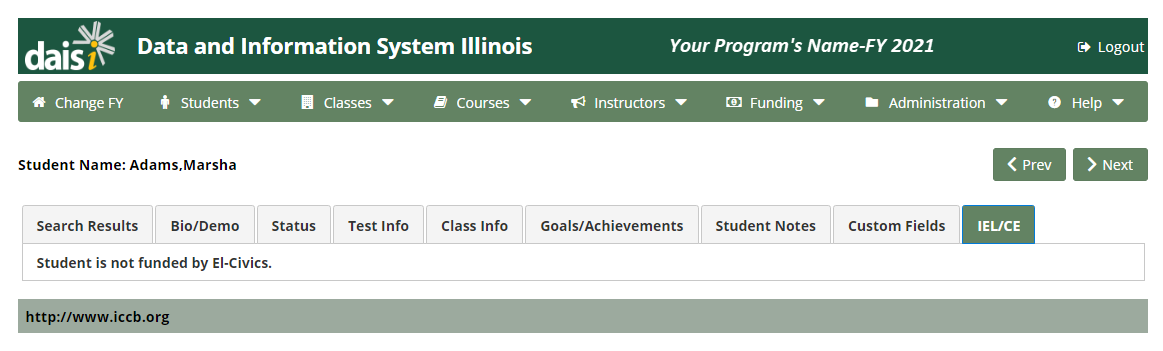
IEL/CE
The eighth and final screen of student data is provided to record EL/Civics competencies for students that receive funding in that area. If a student is not funded by EL/Civics, the screen will state the selected student is not funded by EL/Civics and in this case no data entry is required.
If a student is funded by EL/Civics, he/she should accomplish a specific number of competencies per unit of instruction. An alert is displayed for any student who is in non-compliance. Please see the AEFL Provider Manual for further information regarding competency requirements.
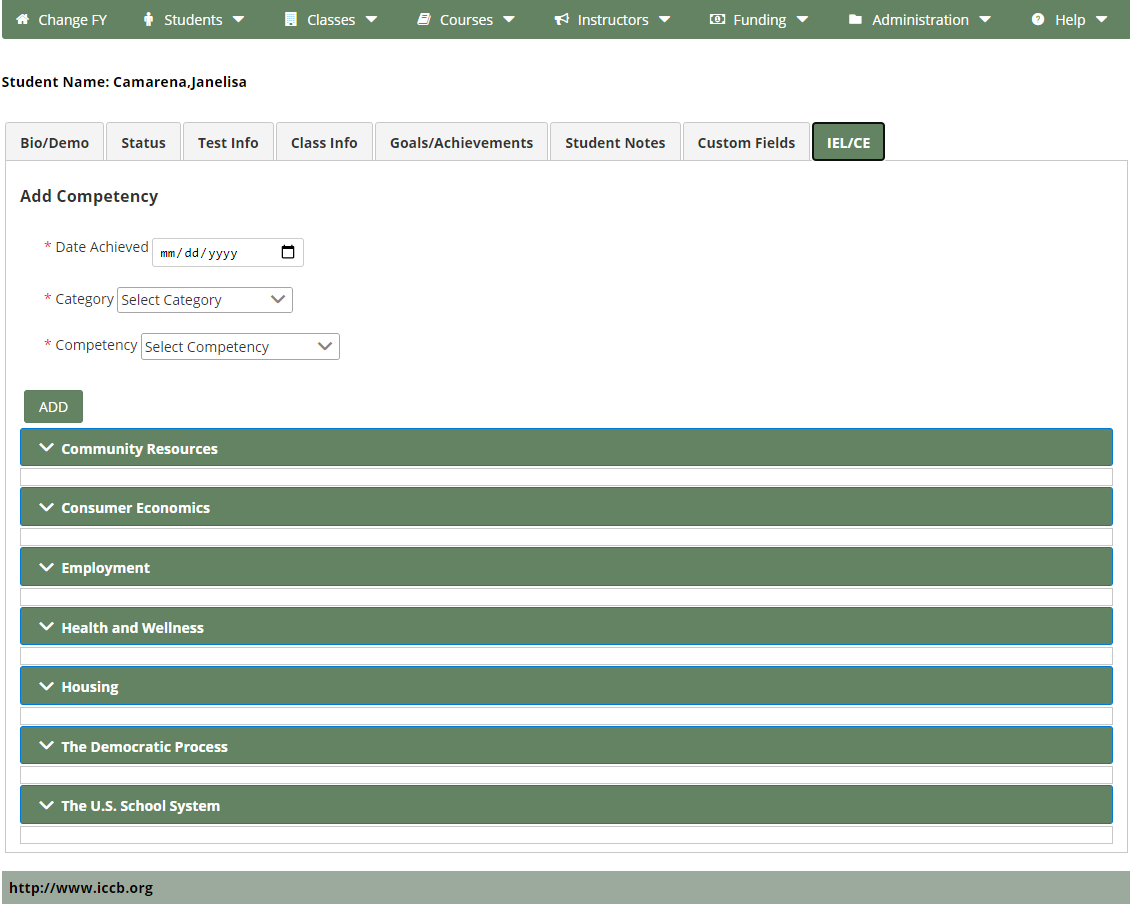
Add Competency
Competencies are recorded by entering the date they are completed, selecting the category from the drop-down list provided, and then selecting the competency.
Click Add to save the changes.
View Competencies
Competencies achieved to-date are listed on the bottom half of the EL/Civics screen. To remove a competency, click the delete link to the right of the selected competency. The delete function is permanent so please use with caution.
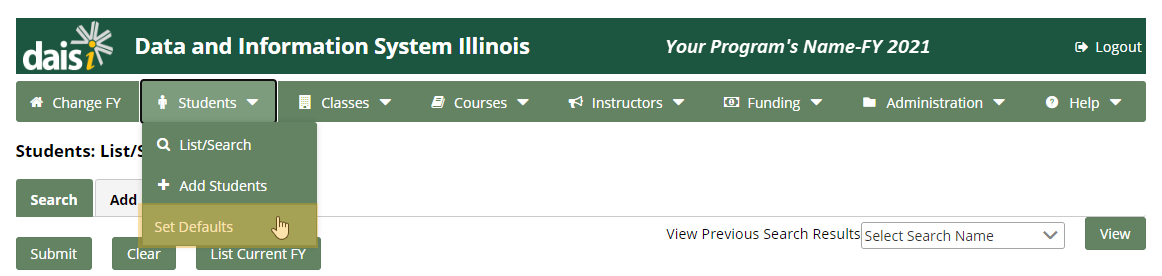
Set Defaults
Default values can be set for data entry of student information. The default values set will be displayed each time a new student is entered.
To set up student defaults, select the Set Defaults link from the Students navigation tab.
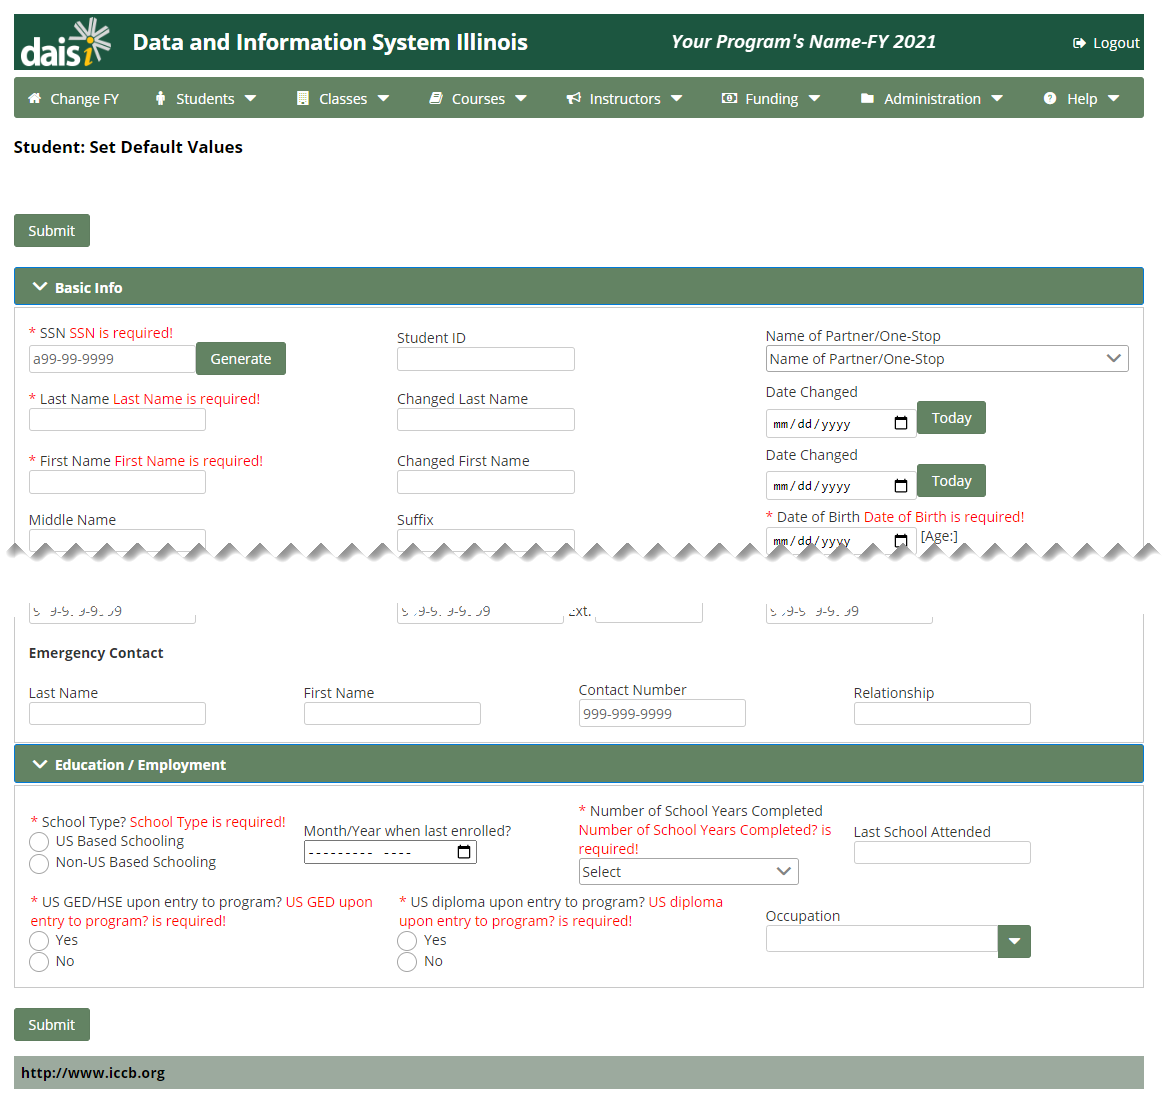
Each field of student information can have a default value.
The default values set will be displayed each time a new student is entered.
For example, setting the Gender field to “Female” will result in “Female” being selected in the Gender field for all new students. You are able to adjust the selection to “Male” when needed.
When all the defaults have been entered, click on Submit at the top or bottom of the page to save the changes.
Was this page helpful? Let us know.